Overview
Managing unstructured data at scale is a growing challenge, but Starfish Storage offers a modern solution built to meet that need. Starfish provides deep visibility into file systems—both current and historical—while orchestrating the entire data lifecycle from discovery to migration across file and object storage. It enables enriched metadata tagging, high-performance scanning, and automated actions like backup, restore, and archiving.
At the heart of Starfish is the Unstructured Data Catalog (UDC), a powerful index of metadata, job results, and file history that can be queried and acted upon through a CLI, GUI, or API. With its scalable job manager and ability to handle billions of files and petabytes of data, Starfish transforms file system metadata into actionable intelligence—empowering organizations to make data-informed decisions and automate operations with confidence.
Before I get started, for those not familiar with all the technologies we’re going to go over in this article today I’ll start with a brief synopsis of each to get everyone up to speed.
Starfish Storage is…
… a software platform designed to manage and make sense of large-scale unstructured data environments. It provides a centralized system for discovering, indexing, analyzing, and orchestrating data across file systems and object storage platforms.
Key capabilities include:
- High-performance scanning of file systems using Scan Accelerators
- Visibility into file system activity, including file age, size, duplication, and change rates
- Metadata enrichment through user-defined tags and file-derived key-value pairs
- Automated data movement for backup, restore, archiving, and migration
- Job orchestration via a scalable job manager and customizable workflows
- User interaction through CLI, HTML5 GUI, or API
Starfish is built to go far beyond the limits of traditional scripts and manual file system tools, offering a scalable and intelligent approach to unstructured data management for enterprise environments.
QuantaStor is…
… an enterprise-grade Software Defined Storage platform that turns standard servers into multi-protocol, scale-out storage appliances and delivers file, block, and object storage. OSNexus has made managing enterprise-grade, performant scale-out storage (Ceph-based) and scale-up storage (ZFS-based) extremely simple in QuantaStor, and able to be done quickly from anywhere. The differentiating Storage Grid technology makes storage management a breeze.
At a Glance
In this post I’ll be standing up Starfish and using it with QuantaStor in two ways. First, I’ll set up QuantaStor Scale-Out Object Storage to use it as, what Starfish calls, an Archive Target, allowing administrators to archive content to an Amazon S3-compatible object storage bucket. Second, I’ll set up QuantaStor Scale-Out File Storage and fill it with some content for Starfish to analyze. Starfish can scan anything that can be mounted to a node running the Starfish agent, and in this case I’ll be mounting the Scale-Out File Storage to the Starfish server itself using CephFS. Finally, I’ll run through a Starfish install and configure it to use the QuantaStor aspects we configured.
Let’s Go!!
Here’s the agenda:
- Setup the Scale-Out Object Storage
- Setup the Scale-Out File Storage
- Create file storage credentials and connection info
- Retrieve object storage credentials and connection info
- Install Starfish
- Configure Starfish to use Scale-Out File and Scale-Out Object Storage
In addition, during the process I cloned some random Git repos to the CephFS storage so there would be content for Starfish to scan. I also duplicated those directories and used Git to revert to a previous version of each of the source trees. Again, this is just to give Starfish something to chew on and not required for your project.
It will be good for you to know the layout of the QuantaStor Web UI so I can easily convey instructions for you to follow along.
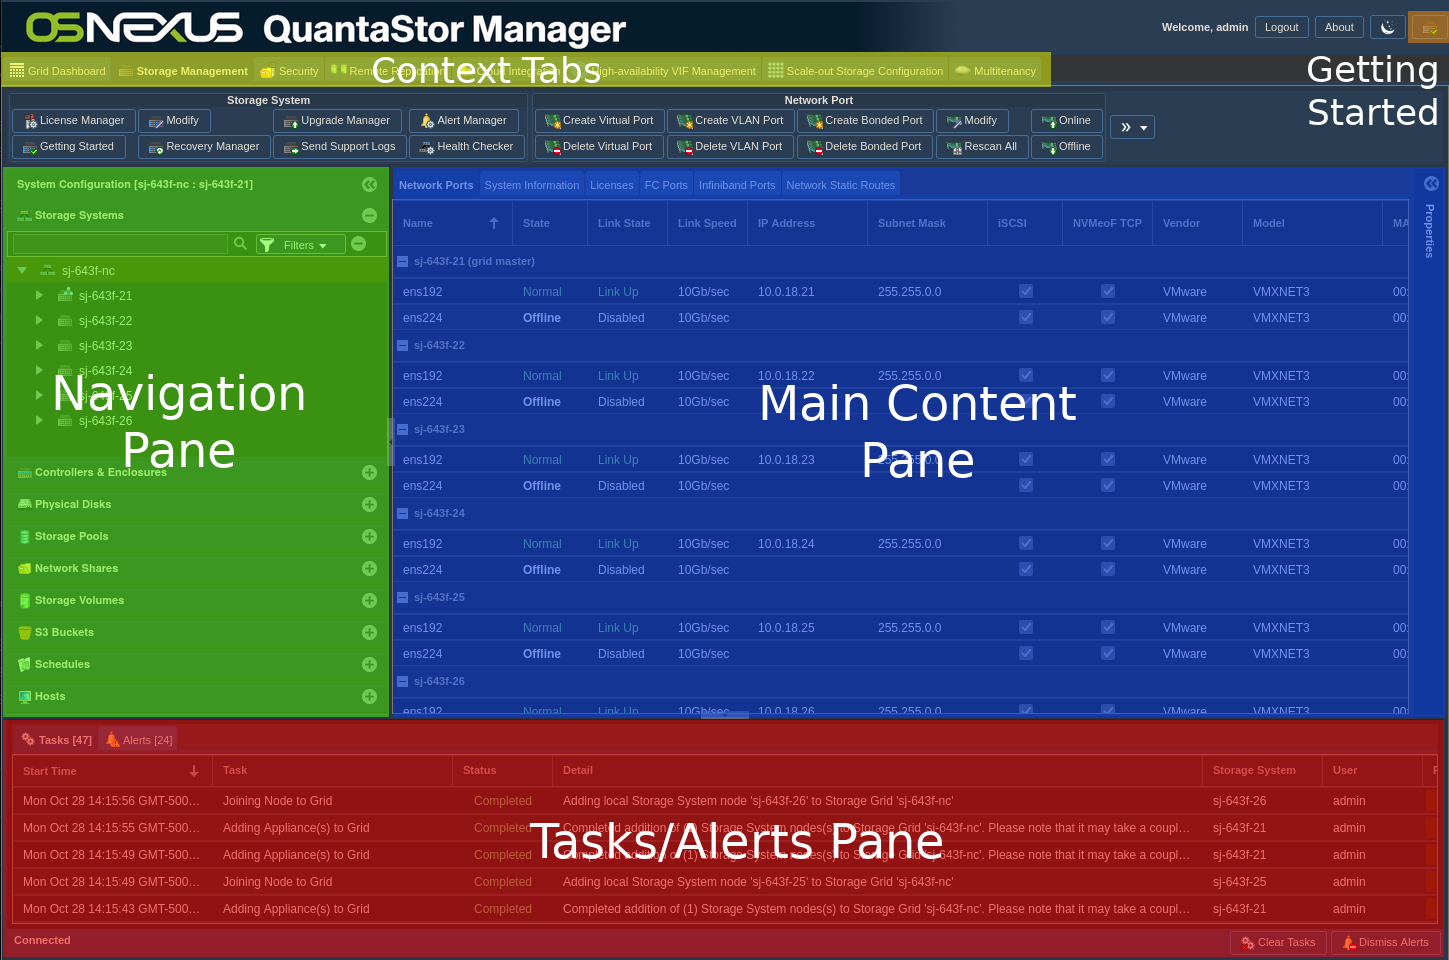
The “Getting Started / Configuration Guide” button at the top right of the UI will be your friend through this process as I will navigate back to it repeatedly while configuring QuantaStor. Depending on the size of your monitor, you could leave the Getting Started dialog up for much of the time and know when to proceed when the activities in the Tasks Pane complete. If the Tasks Pane is obscured by the Getting Started dialog, feel free to close it and re-open it when directed. Past that, we will be bouncing around the Context Tabs later as well.
I will not be covering the installation of QuantaStor, nor the installation of the OS of the node I will be installing Starfish on.
Activity Components
For this Proof of Concept, I’m using virtual machines running on VMware vSphere with a 6-node QuantaStor Storage Grid with each QuantaStor VM containing:
- vCPUs: 6
- RAM: 8GB
- OS: QuantaStor 6.5
- Networking: Single 10GB connection with simple, combined front-end and back-end configuration
- Storage:
- 1 x 100GB SSD for QS OS install/boot
- 2 x 100GB SSDs for journaling
- 4 x 10GB SSDs for data
Starfish 6.6 – Single VM running Ubuntu 24.04 (minimized):
- vCPUs: 8
- RAM: 32GB
- Network: Single 10GB Network connection with a static IP address
- Storage:
- 1 x 30GB vDisk (boot/app)
- 1 x 100GB vDisk (data)
Setup the Scale-Out Object Storage
After logging into the QuantaStor Web UI you’ll be presented with an interface similar to this:
ACTION: Click “Getting Started / Configuration Guide” button

ACTION: Click “Setup Scale-out Object Pool” button on left

ACTION: Click “Create Cluster” in the right pane

ACTION: Configure Cluster:
- Give it a name
- Select all the nodes to participate in the cluster (selected all)
- Choose to use Compression and/or Encryption
NOTE: These options can ONLY be configured at pool creation!! - Click OK
ACTION: Validate your compression/encryption selection by clicking Yes

Now we wait for cluster to be created. As mentioned above, you can close the Getting Started dialog to see the Tasks Pane and re-open it. Here’s what the interface looks like after the previous activity is completed.
ACTION: Click “Getting Started / Configuration Guide” button
ACTION: Click “Setup Scale-out Object Pool” button on left
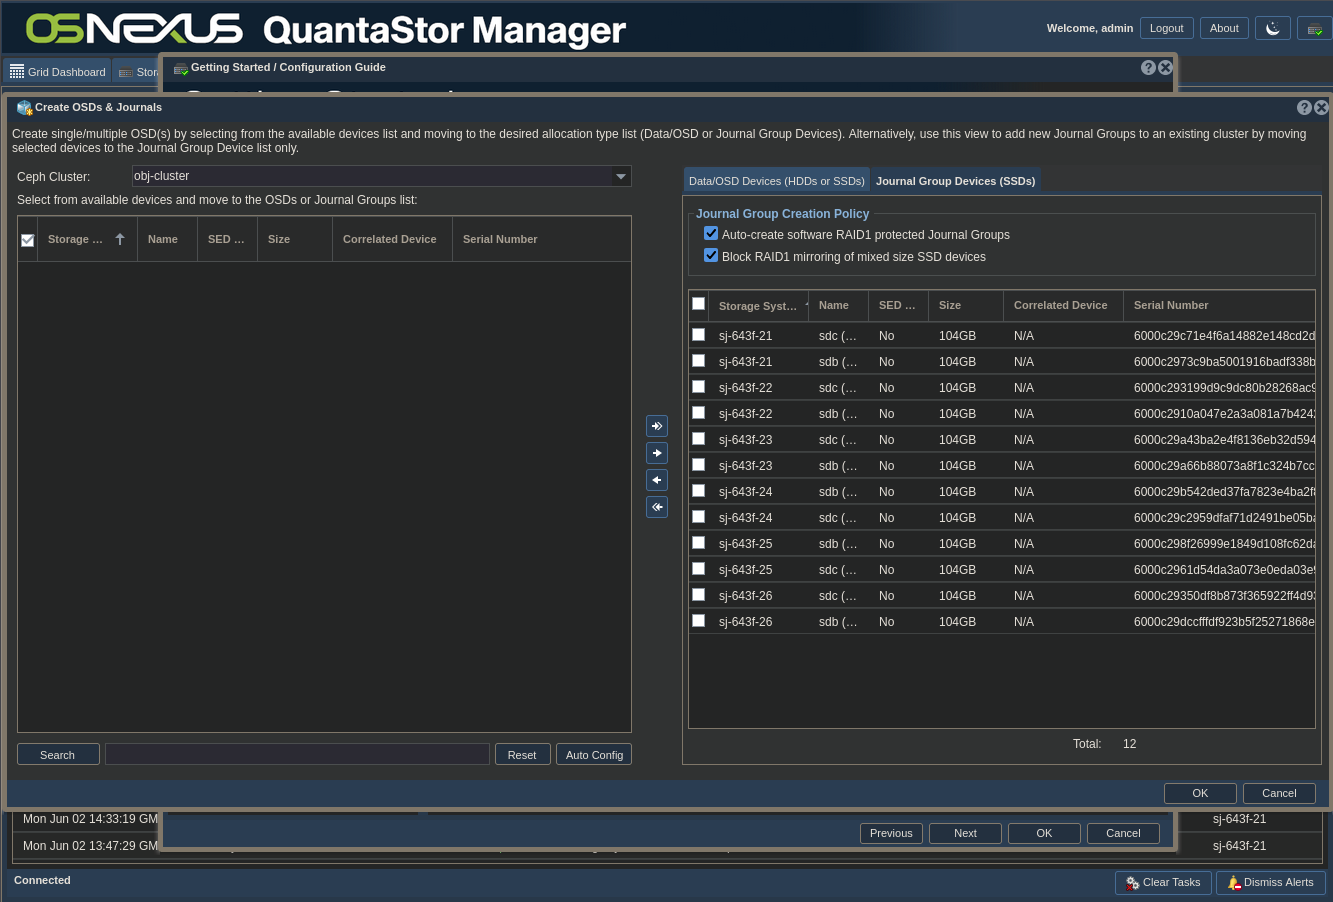
ACTION: Click “Create OSDs & Journals” in the right pane
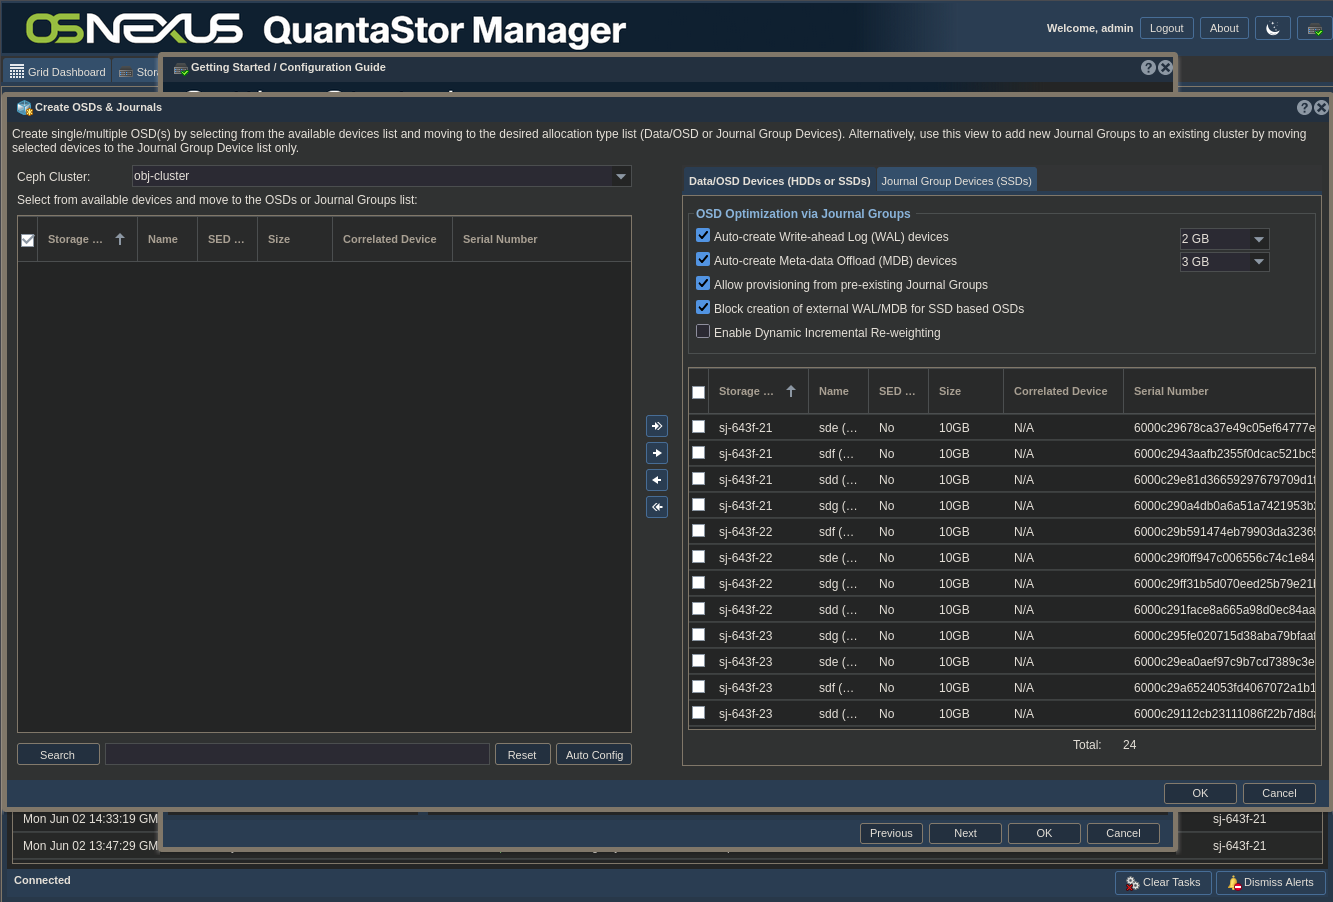
ACTION: Configure OSDs & Journals:
- Clicking the “Auto Config” button at the bottom of the left pane will separate the devices to be used as OSD devices and Journal devices based on the characteristics of the devices
- Click the two tabs on the right side to see how the devices were divvied up. The first tab is shown in the screenshot above and the second is shown in the screenshot below.
- Make adjustments as necessary
- Click OK
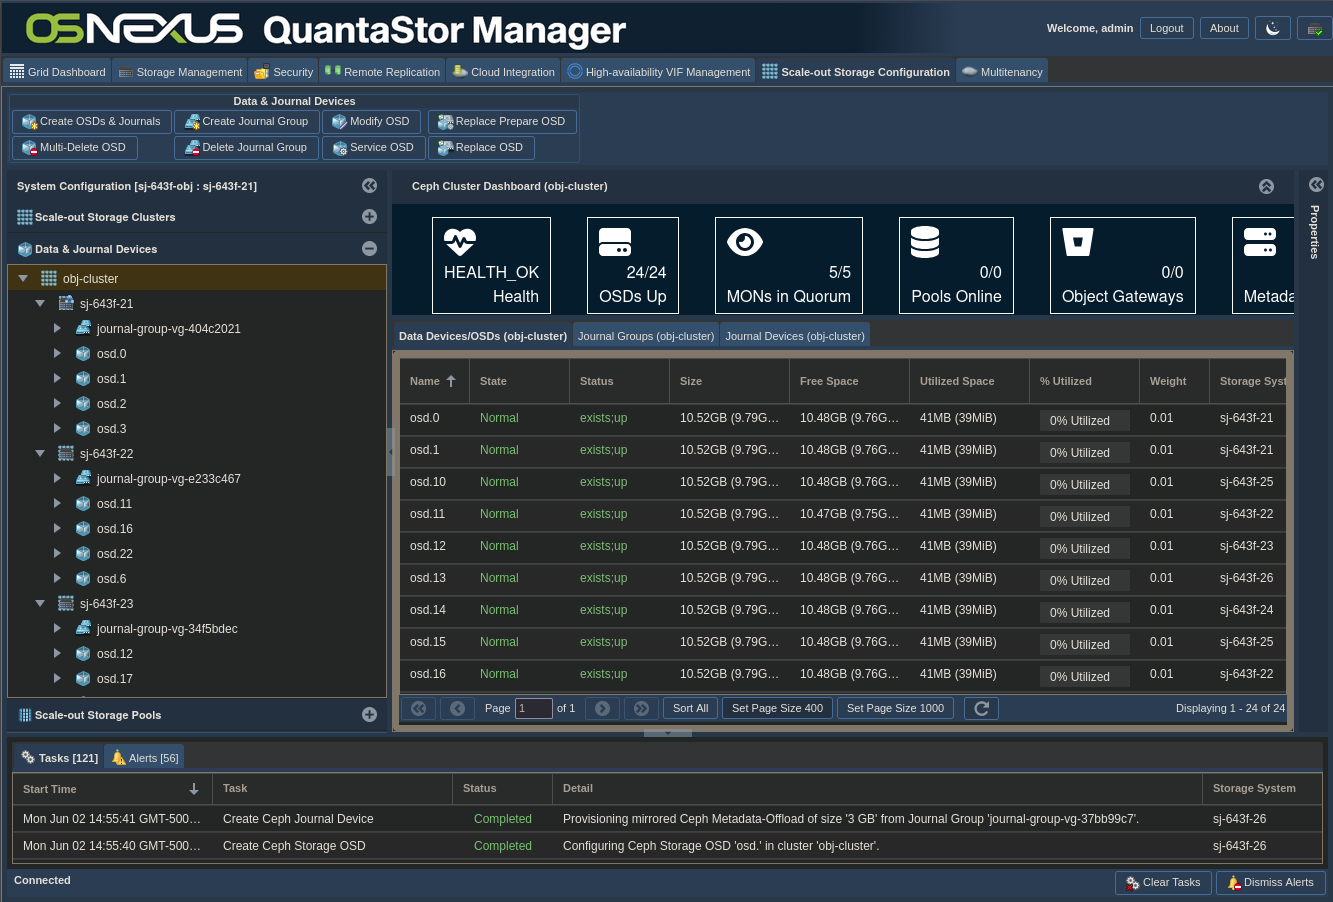
Now wait for the OSDs and Journals to be configured. Here’s the interface afterward.
NOTE: You’ll find that the steps above are common to the Scale-Out Object Pool section and the Scale-Out File Pool section of the Getting Started dialog. They only need to be completed once. Both sections build on the same foundation past this point.
ACTION: Click “Getting Started / Configuration Guide” button
ACTION: Click “Setup Scale-out Object Pool” button on left
ACTION: Click “Create Object Pool Group” in the right pane
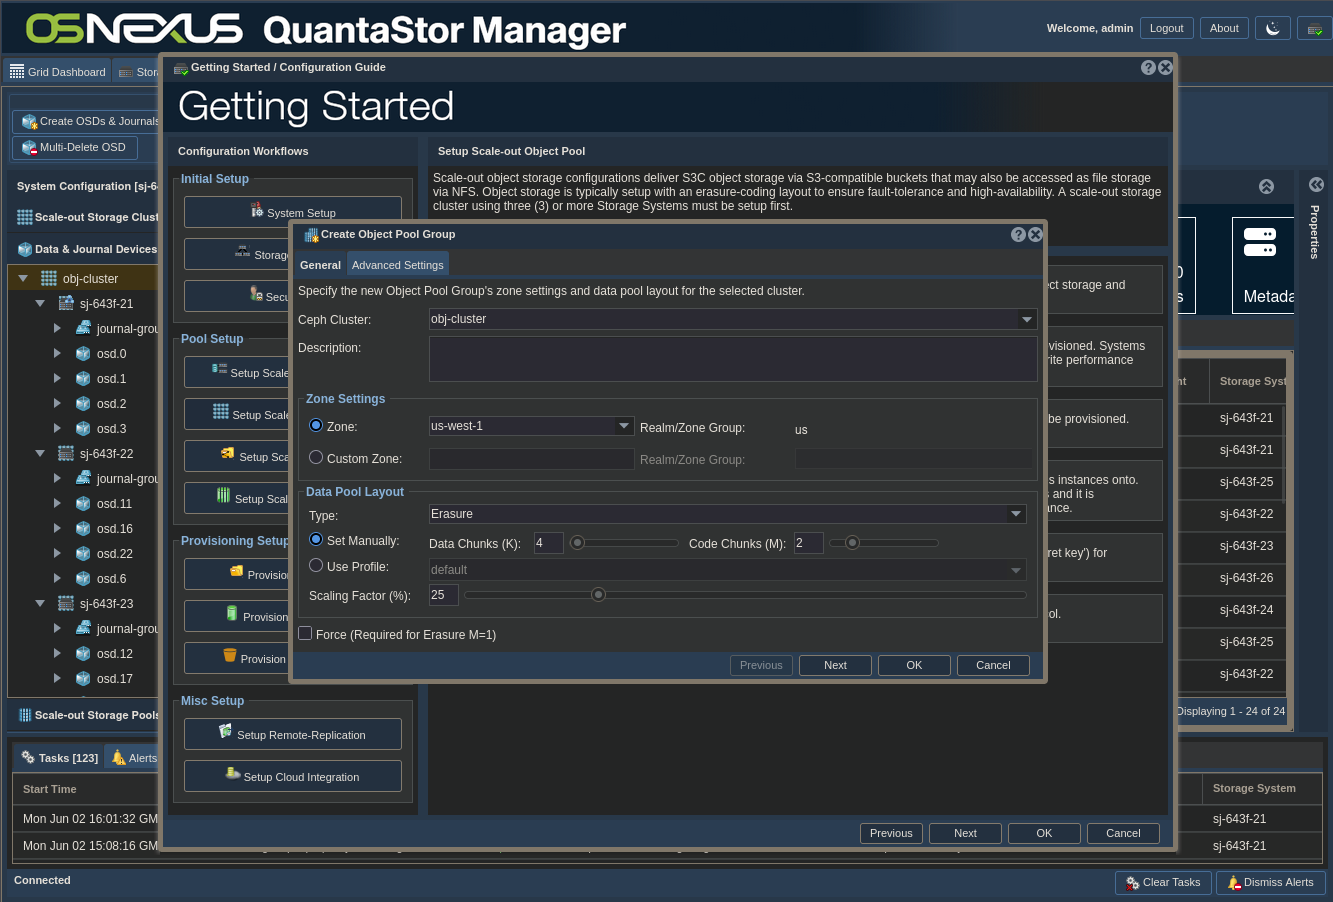
ACTION: Configure Object Pool Group
- Set Zone: Only use custom zones if you KNOW the software you’re using to connect to the object store supports non-AWS zones. NOTE the zone you use as you may want it later for connection.
- Set Type: Decide on using Erasure coding or mirroring for protection
- If using Erasure coding, set data chunks and code chunks (parity) values
- Set Scaling Factor based on expected use of the object pool. I’m using the value of 25% each for object and file storage, which leaves room for growth later. REFERENCE??
- Click OK
Now wait for Object Pool Group to be configured. Here’s the interface afterward.

ACTION: Click “Getting Started / Configuration Guide” button
ACTION: Click “Setup Scale-out Object Pool” button on left
ACTION: Click “Add Object Gateway” in the right pane

ACTION: Configure Object Gateway
- Select all nodes
- Select Advanced Settings tab

- Change Object Gateway Mode to HTTP -> HTTP
- Note Object Gateway Port of 7480
- Click OK
Now wait for Object Gateways to be configured. Here’s the interface afterward.

ACTION: Click “Getting Started / Configuration Guide” button
ACTION: Click “Setup Scale-out Object Pool” button on left
ACTION: Click “Create Object User” in the right pane

ACTION: Configure Object User
- Change Username
- Click OK
Now wait for User to be created. We’ll see the interface for users later.
ACTION: Click “Getting Started / Configuration Guide” button
ACTION: Click “Setup Scale-out Object Pool” button on left
ACTION: Click “Create Object Bucket” in the right pane
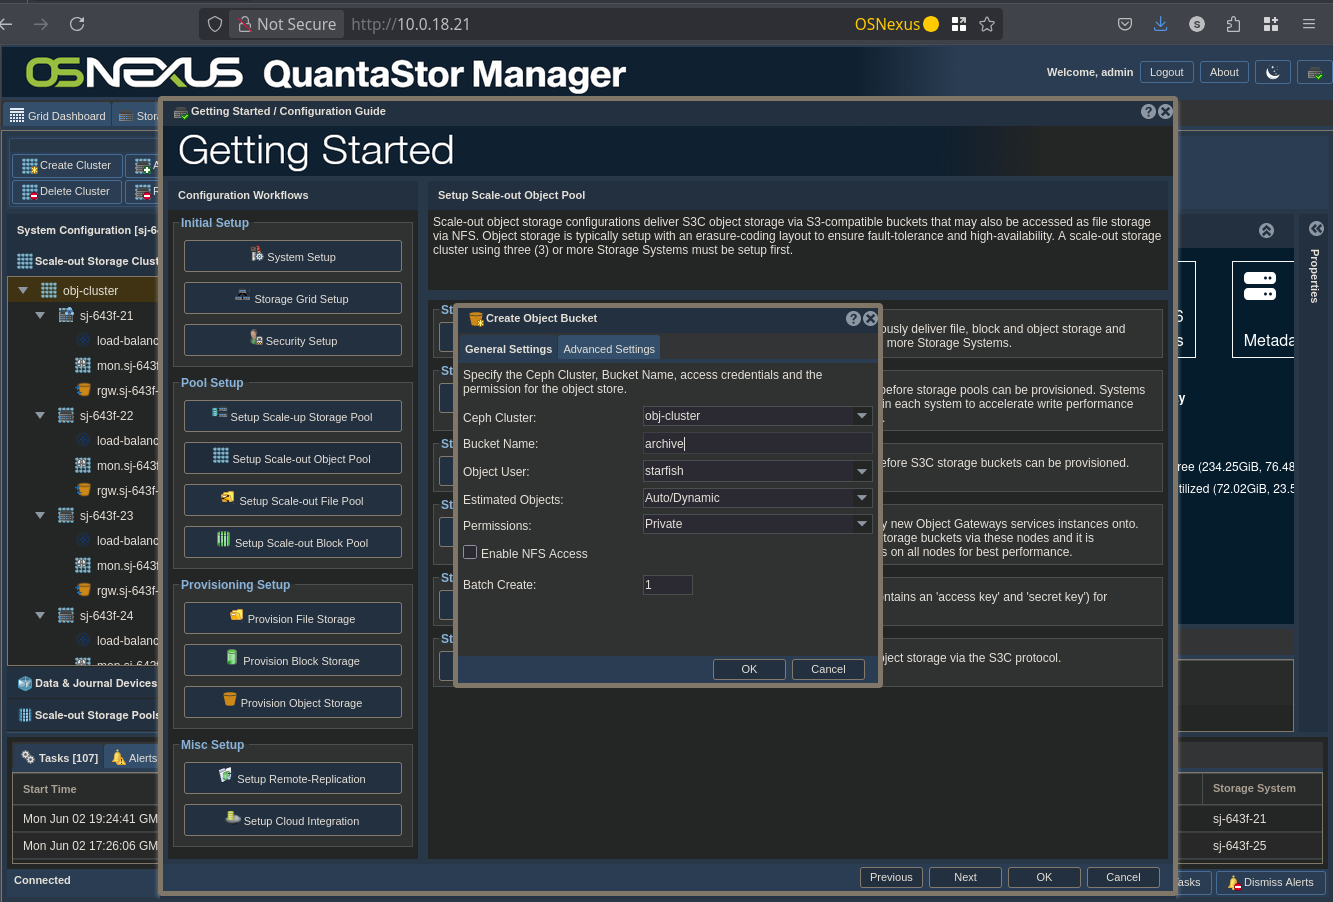
ACTION: Configure Object Bucket
- Change Bucket Name
- Click OK
Now wait for the bucket to be created. We’ll see the interface for buckets later.
That’s it for configuring Scale-Out Object Storage.
Setup the Scale-Out File Storage
ACTION: Click “Getting Started / Configuration Guide” button
ACTION: Click “Setup Scale-out File Pool” button on left
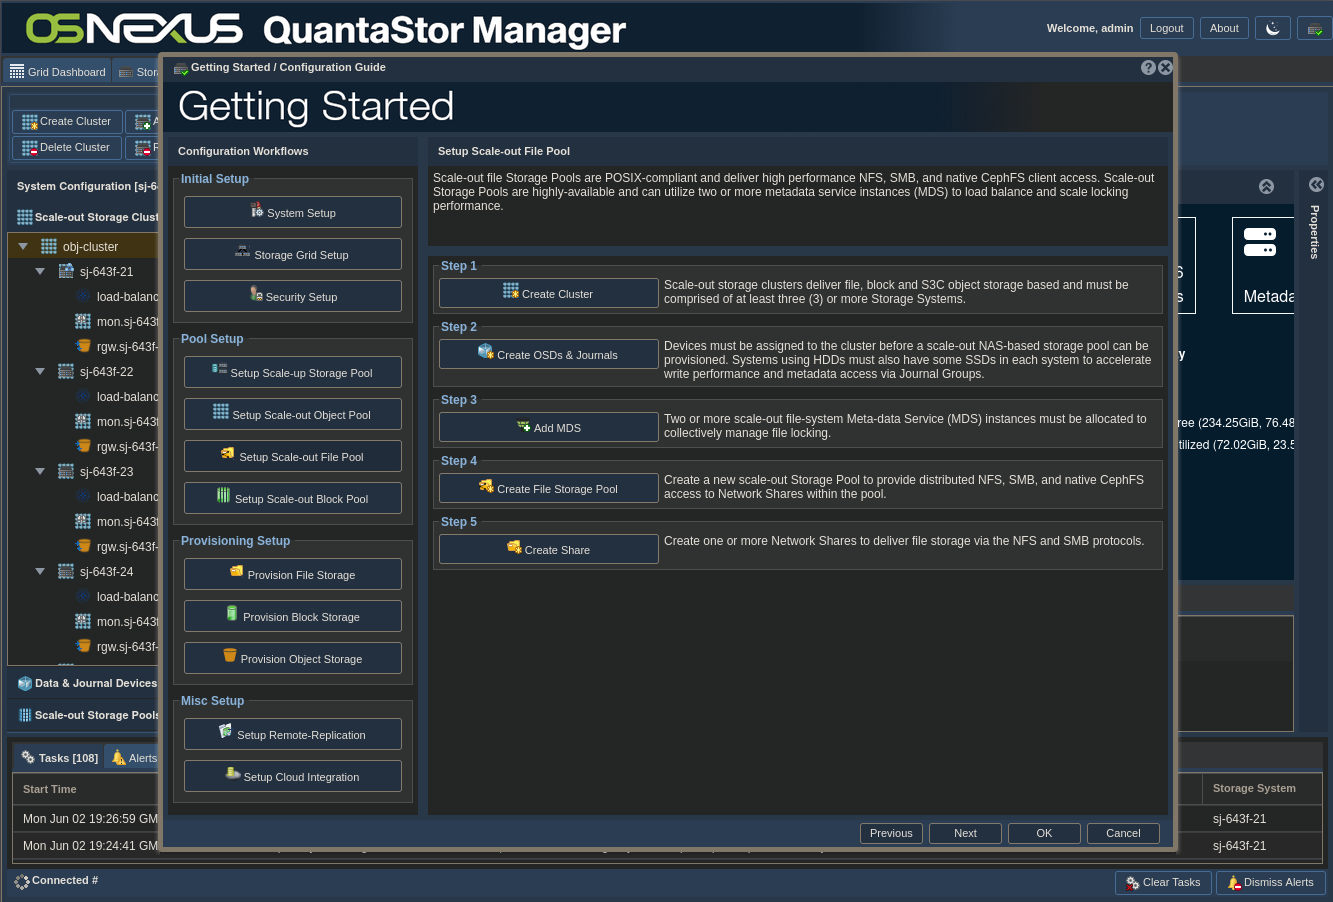
ACTION: Click “Add MDS”

ACTION: Configure MDS
- Select all nodes
- Click OK
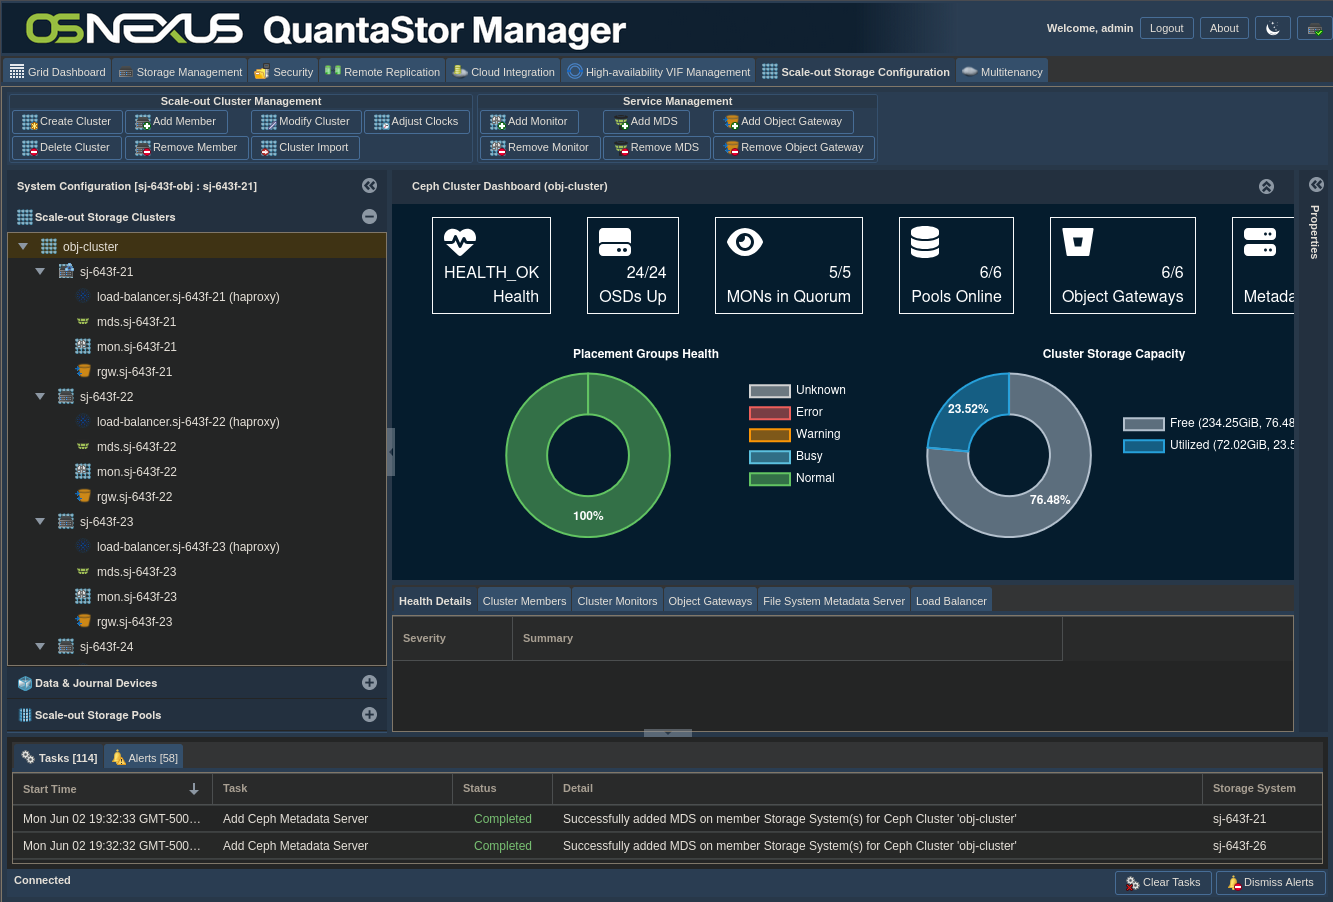
Now wait for MDS services to be created. Here’s the interface afterward.
ACTION: Click “Getting Started / Configuration Guide” button
ACTION: Click “Setup Scale-out File Pool” button on left
ACTION: Click “Create File Storage Pool”
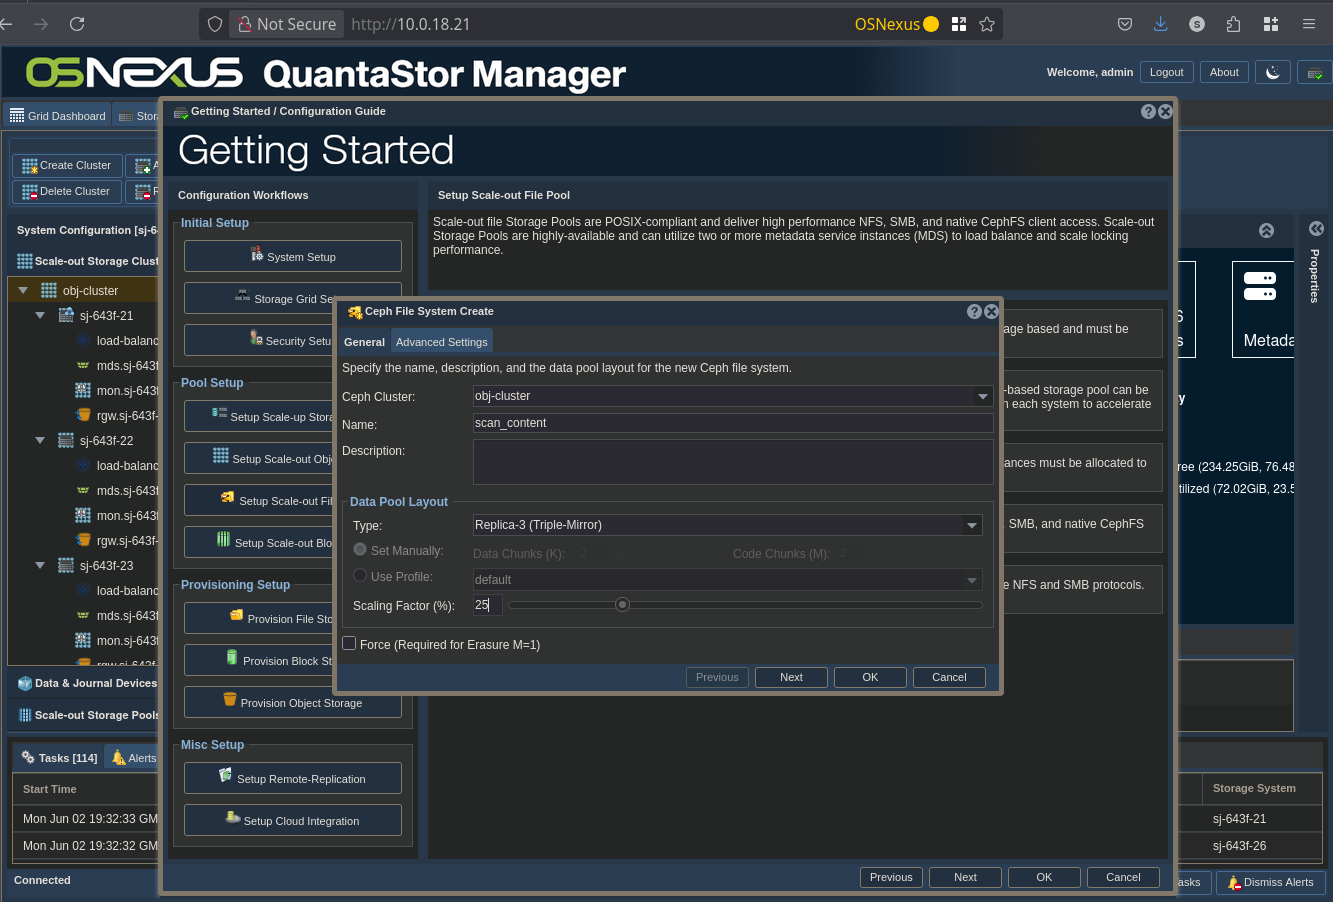
ACTION: Configure File Storage Pool
- Change Name
- Change Type to Replica-3
- Set Scaling Factor to 25%
- Click OK
Now wait for the File Storage Pool to be created. Here’s the interface afterward.

ACTION: Click “Getting Started / Configuration Guide” button
ACTION: Click “Setup Scale-out File Pool” button on left
ACTION: Click “Create Share”

ACTION: Configure Share
- Change Name
- Uncheck “Enable CIFS/SMB Access”
- Uncheck “Enable Public NFS Access”
- NOTE: Enabled grays out, which is OK.
- Click OK
Now wait for the Share to be created. We’re going to be using CephFS to access this share, not CIFS or NFS, so we can disable both of those. Here’s the interface afterward.
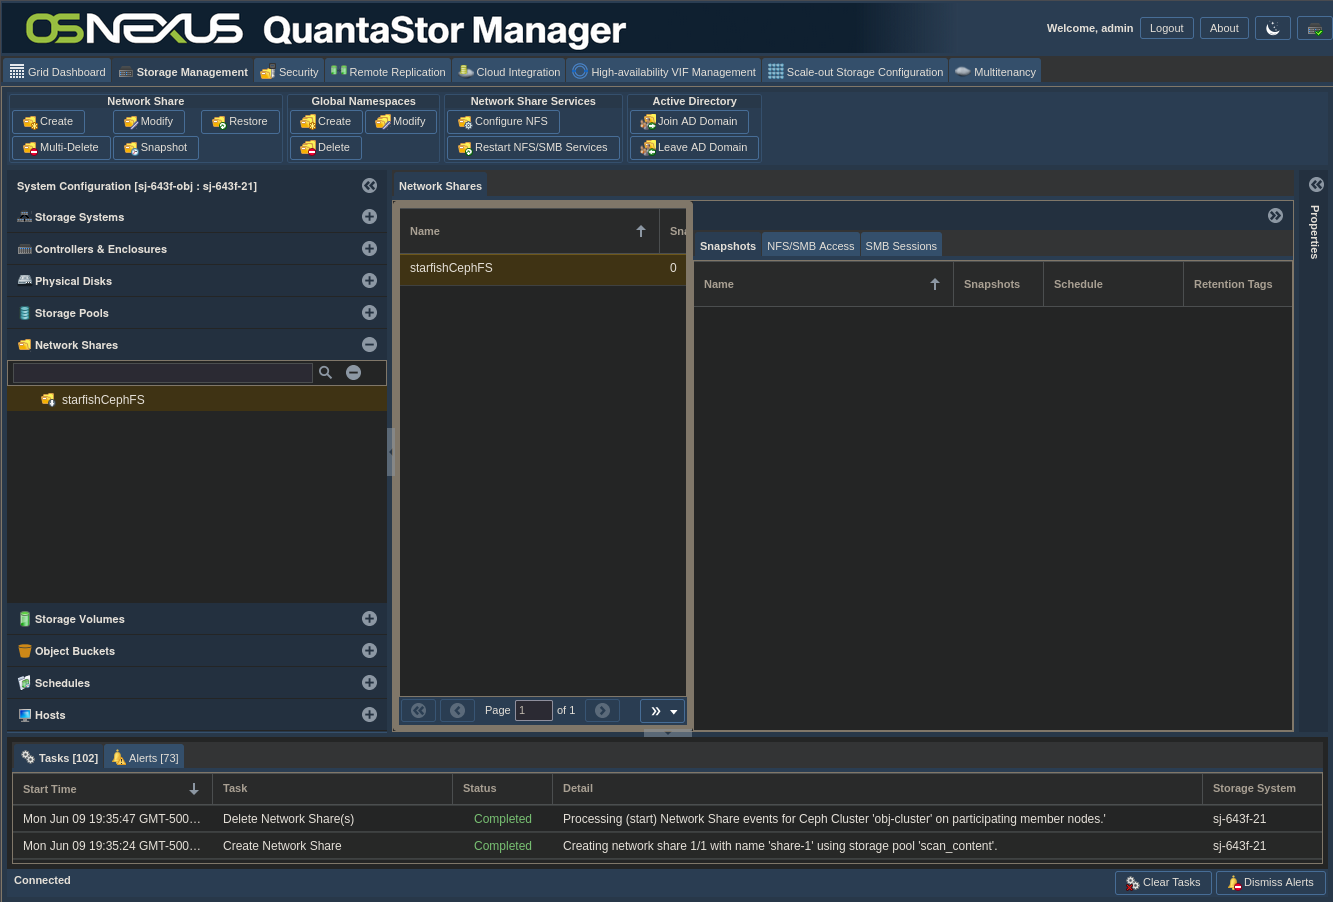
And that’s it for Scale-Out File Storage configuration. Now we need to do some user management and gather information that we’ll use to connect from Starfish to our Scale-Out Storage.
Create file storage credentials and connection info
ACTION: Click “Security” tab
ACTION: Click “Scale-out File & Block Keyrings” in navigation pane
ACTION: Right-click the “Scale-out File & Block Keyrings” heading in left pane
ACTION: Click “Create Client Keyring”

ACTION: Configure the Client (CephFS user)
- Change Name
- Check the Share you created previously
- Click OK
This one will be pretty quick to finish.
ACTION: Right-click the user keyring you just created
ACTION: Click “Export Client Keyring…”
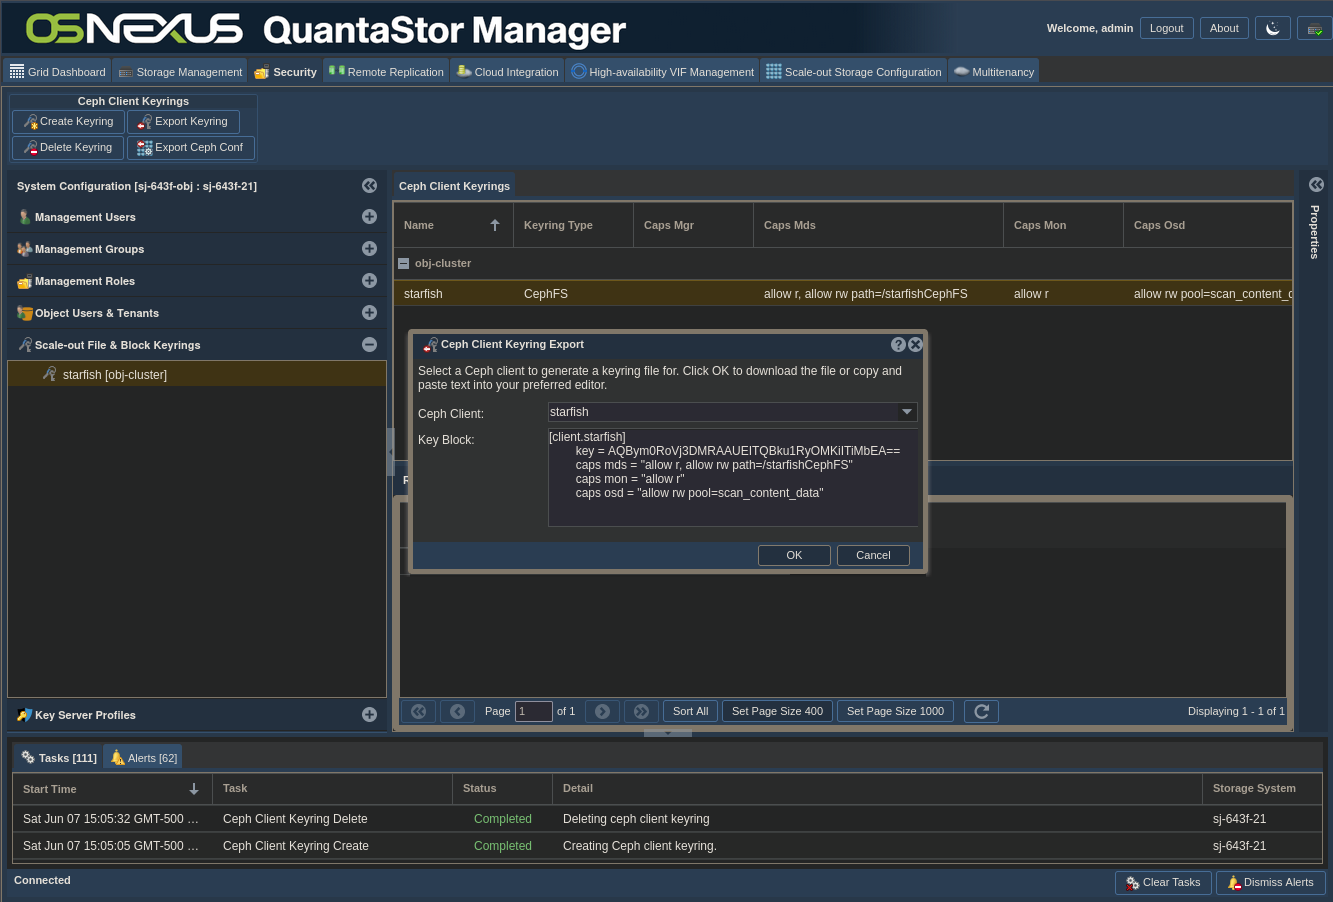
ACTION: Download keyring file
- Click OK
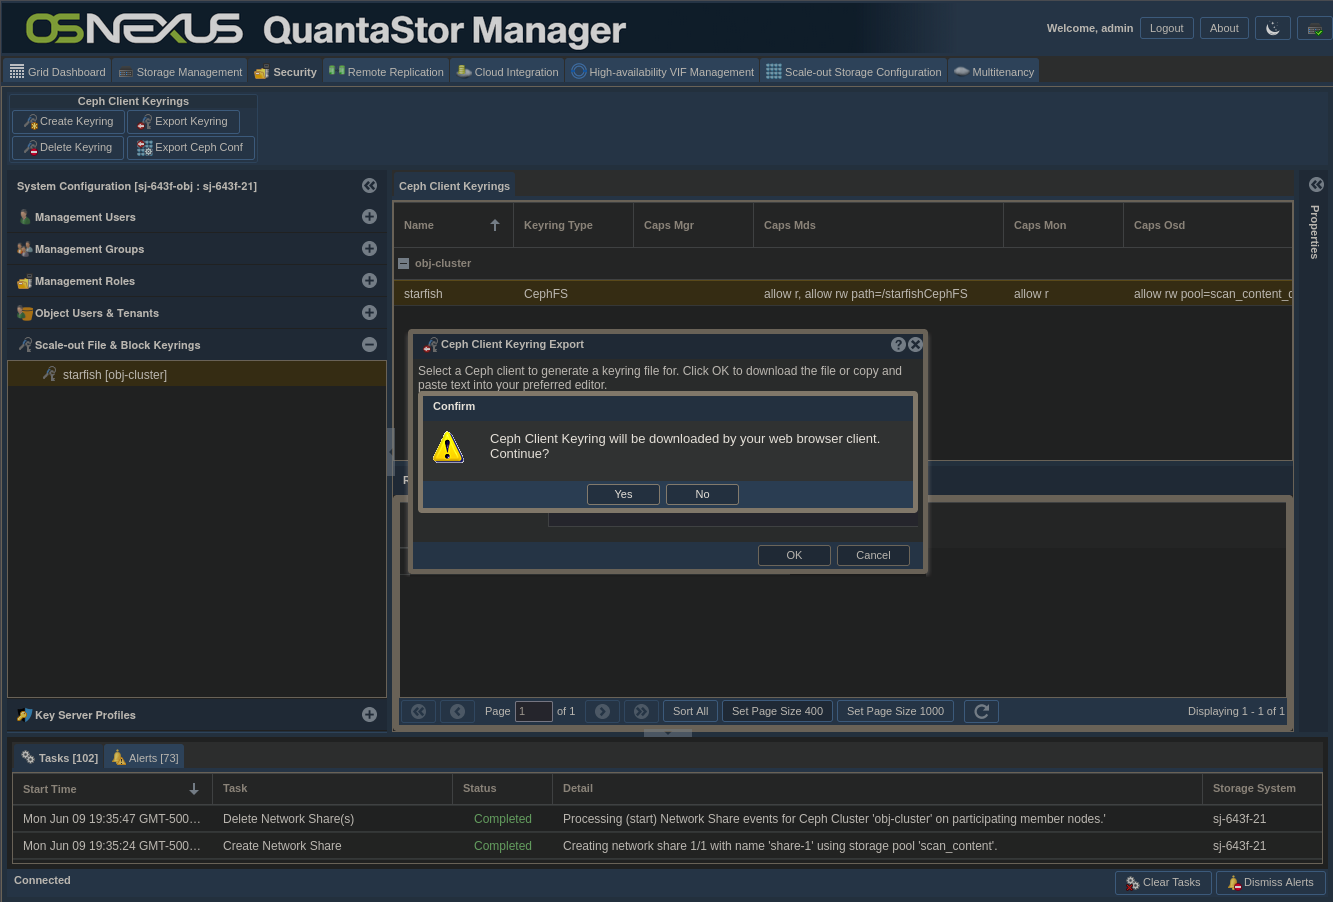
- In the Confirm dialog click Yes to download the keyring file
- Click Cancel to dismiss the dialog
ACTION: Right-click the user keyring again
ACTION: Click “Export Client Conf…”
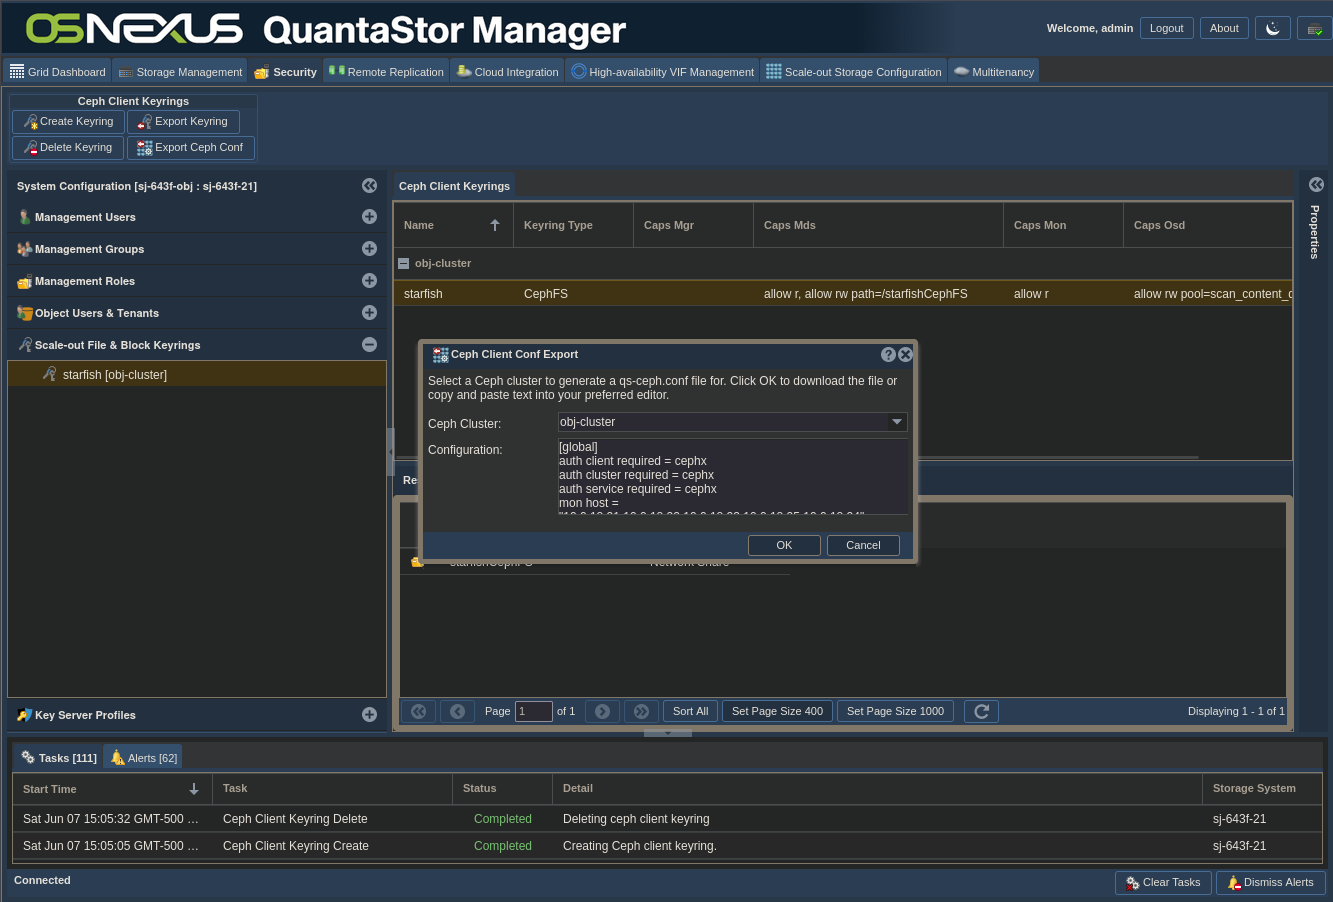
- Click OK
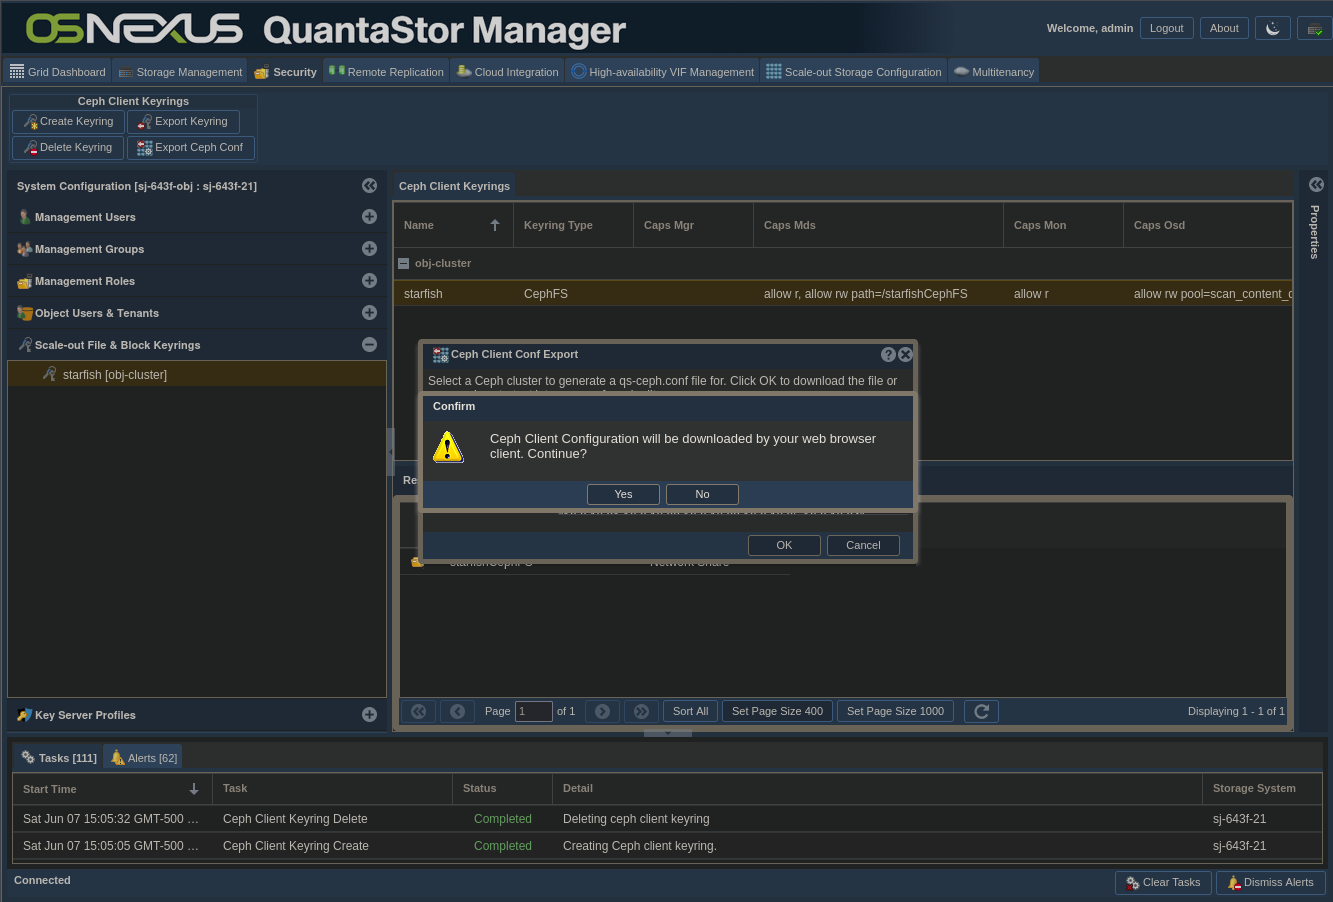
- In the Confirm dialog click Yes to download the ceph.conf file
- Click Cancel to dismiss the dialog
Retrieve object storage credentials and connection info
ACTION: Click the “Security” tab
ACTION: Click “Object Users & Tenants” in left pane
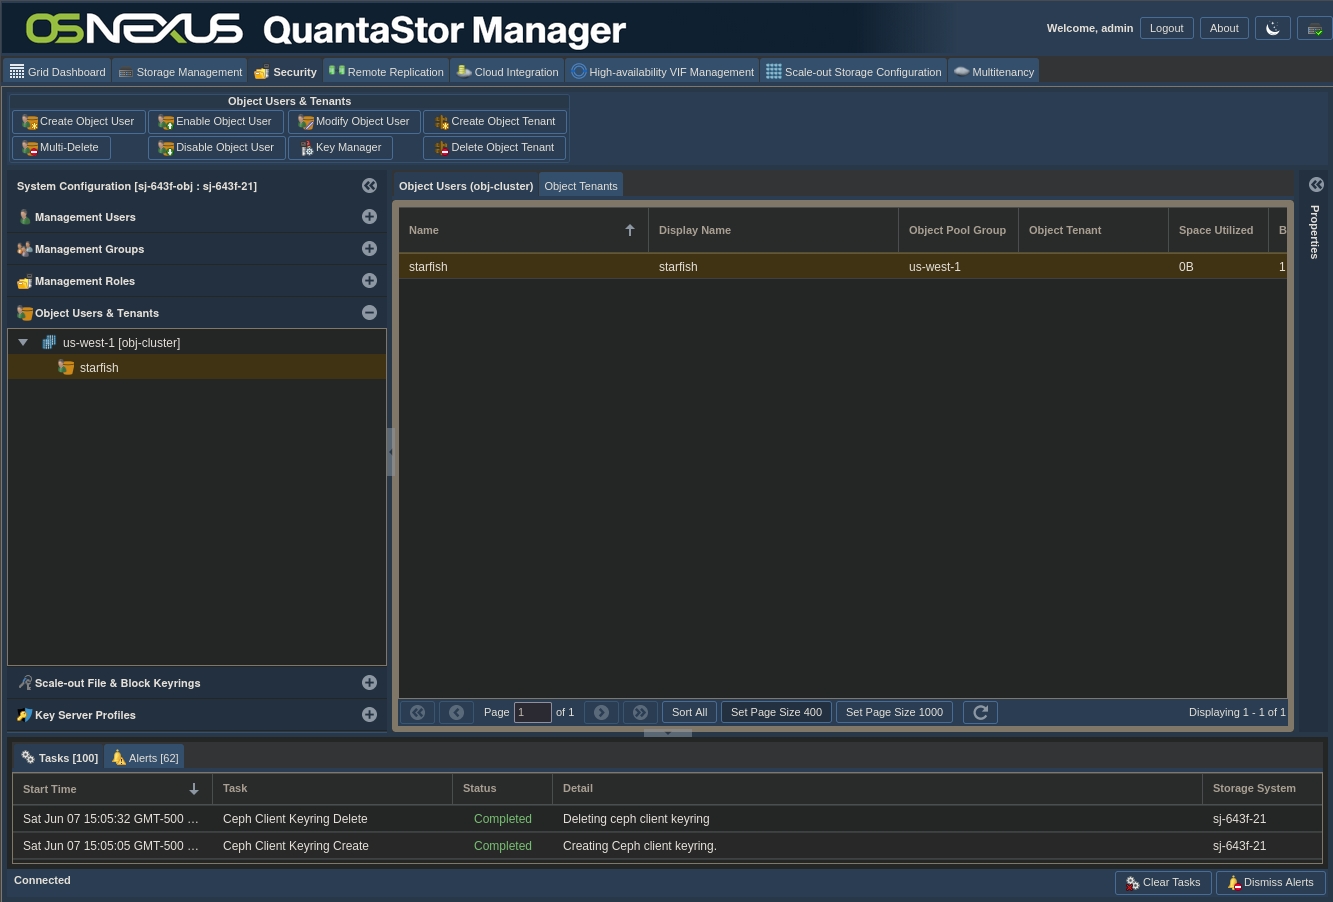
ACTION: Right-click the user you created under the bucket you created
ACTION: Click Manage/View Object User Access Keys
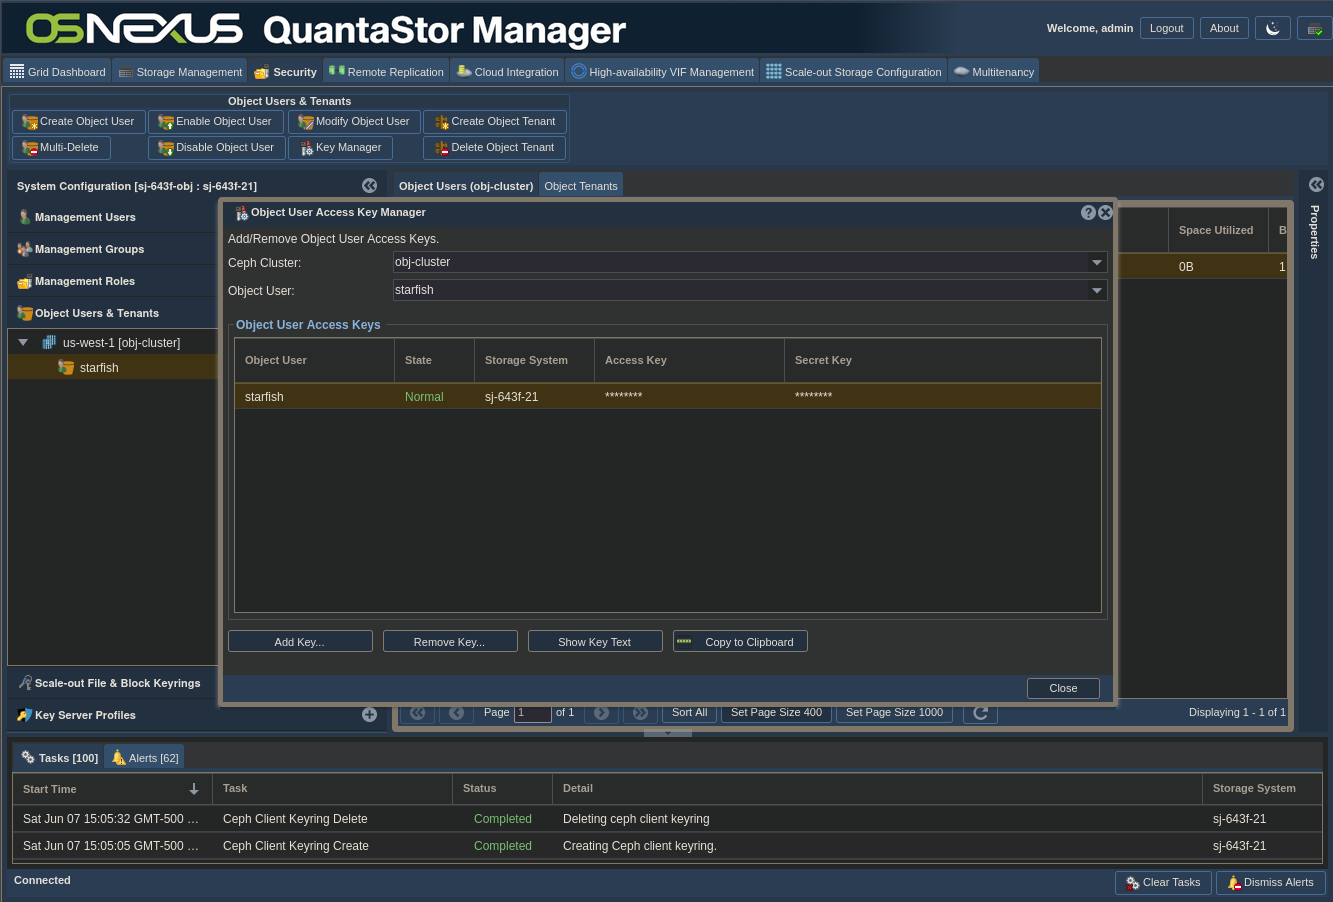
- Make sure the Object User you created is selected
- Click Copy to Clipboard (nothing visibly happens)
- Paste the information somewhere as you’ll use it later. It will be similar to this:
Ceph Clusters: obj-cluster
Object User: starfish
Access Key: CDEEAI76UJ2Q3AUE0958
Secret Key: VLHBJP2QWv5lsbCnPjZYPIxlLWJcdaMVcZRzeEnE - Click Close
- Here’s another chance to note the zone you used for the Object Pool Group created earlier (us-west-1).
This part is optional. If you want to use FQDNs instead of IP addresses for connection to bucket complete the following. In my case, I have a Round-Robin DNS entry that resolves to all of my QuantaStor nodes that I want to use.
ACTION: Click “Scale-out Storage Configuration” tab
ACTION: Click “Scale-out Storage Pools” in left pane
- Expand your storage pool
- Under the Object Pool Group, right-click the “Realm/Zone Group” (us) and click “Modify Realm/Zone Group…”
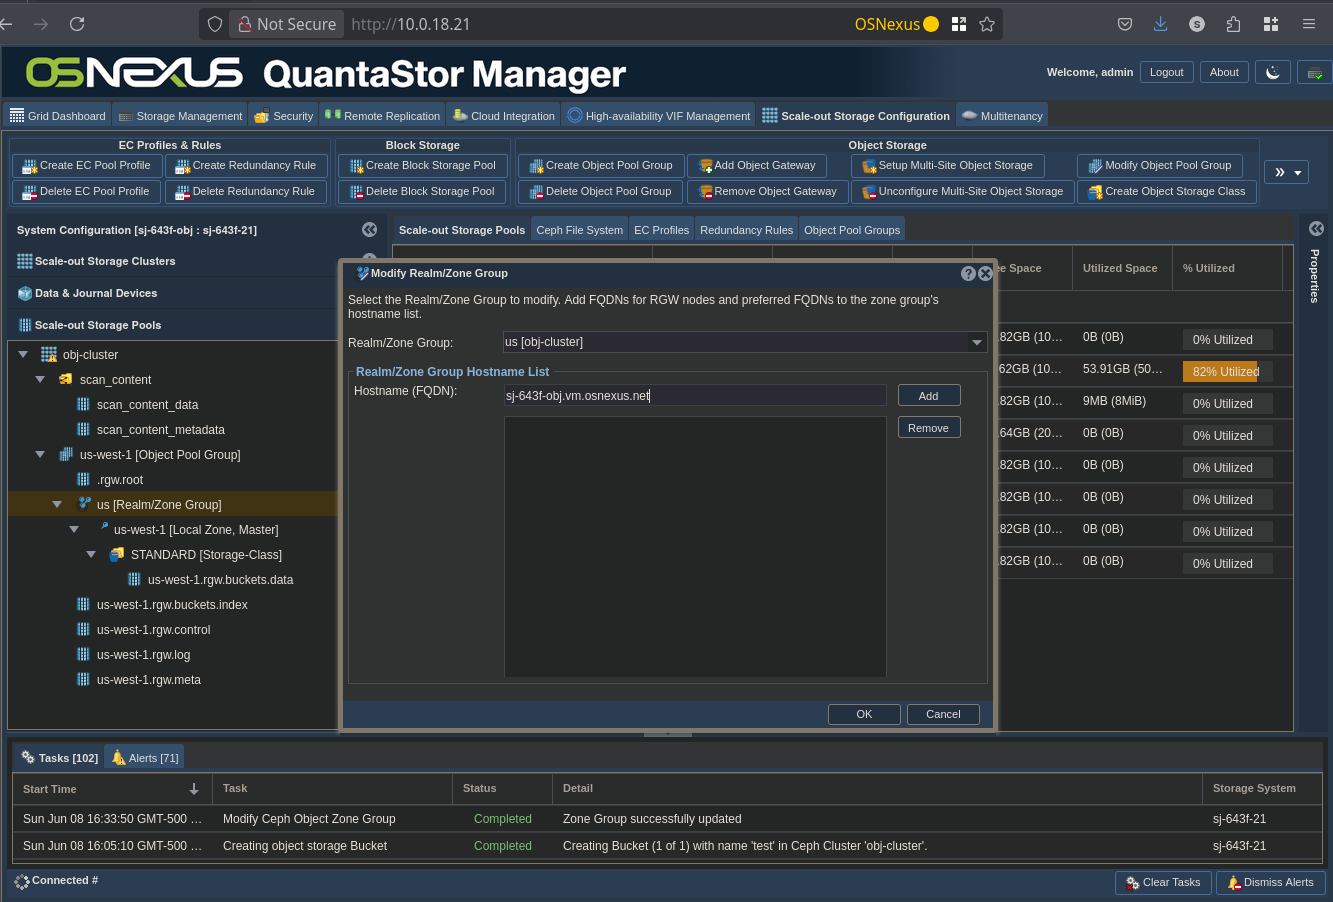
- Add your QS FQDNs by entering them in the “Hostname (FQDN)” field and clicking Add
- When completed, click OK
Storage-side configuration is complete and we have all of the information necessary to use it. Now let’s jump into the Starfish installation.
Install Starfish
This installation will be completed at the CLI of the Starfish node. I’m using an SSH connection to the node to complete it.
The cornerstone of Starfish is a PostgreSQL database which requires at least 64GB of disk space just to install. If you’re setting this up for real have a discussion with your Starfish engineer to determine how much space you should allocate for your expected use. For me, and to make things easy, I created a 100GB virtual disk and mounted it to /opt, which is where Starfish installs.
Before doing the install you need to copy a couple files to your Starfish node, namely the installer and the license file, both of which you’ll get directly from Starfish. My username on my Starfish node is qadmin, so I created a starfish directory in my home directory and used SCP to copy the files to /home/qadmin/starfish. You also need to install unzip.
Now let’s see the install process. Connect to the node with SSH and change to root (sudo -i). Something to note, if your node is not fully DNS configure, it’s best to use the node’s IP address during install.
root@sf01:/home/qadmin/starfish# ./install-Starfish.sh
Verifying archive integrity...     0%    40%    80%  100%   All good.
Uncompressing install-Starfish.sh     0%    40%    80%  100%
…
Running installation script: install-Starfish/install.sh
Installer version: 6.6.12186+ffc23bedc7
Did not read installation params from /root/.starfish/installation-defaults: not readable
Script called with arguments: /home/qadmin/starfish/install-Starfish/install.sh
License keyfile found: /home/qadmin/starfish/20250708.starfish.OSNexus-steve-jordahl_evaluation.keyfile
Enter Starfish repository URL provided by Starfish Corporation: https://osnexus-steve-jordahl:REDACTED@repo.starfishstorage.com/basic/starfish_apt/deb/ubuntu
Enter host name or IP address (public is recommended) for Starfish to listen on [default=sf01]: REDACTED
Starfish database requires ~2GB of storage per 1M files. Enter a local, non-nfs path where database will store its data [default=/opt/starfish/pg/13]:
To optimize database performance Starfish needs to know the storage type on which database is placed.
    1. HDD
    2. RAID (HDD)
    3. SSD
    4. NVMe
Please enter storage type [default=hdd]: 2
Would you like to set up a backup for Starfish database; type yes or no [default=no]:
You can configure Starfish to send nightly diagnostic/status reports. Emails may be sent to Starfish support or any
custom email to help monitor your installation.
A few questions will be asked to configure those emails and their contents.
All the following options can be modified later by editing /etc/default/starfish.
Would you like nightly diagnostic/status reports to be sent to Starfish support?; type yes, no or obfuscated [default=yes]: no
Would you like nightly diagnostic/status reports (errors only) to be sent to other (internal) recipients? If yes, list the emails here, space separated. Otherwise press enter  [default=]:
Would you like to set the from address? If so, enter it here, otherwise press enter to use the system default [default=]:
Starfish installer installs Redash to provide data visualizations.
Enter username (Redash "email address") used to log in to Redash [default=starfish@starfishstorage.com]:
Enter password used to log in to Redash [min len=6, default=GzbVkgf8XSmOZaB5bb71]: Confirm redash password [min len=6, default=GzbVkgf8XSmOZaB5bb71]: Would you like to enable backup for Redash database; type yes or no [default=no]:
Installing Starfish with the following parameters:
sf-repo-url: "https://REDACTED@repo.starfishstorage.com/basic/starfish_apt/deb/ubuntu"
sf-misc-repo-url: "(default)"
sf-public-repo-url: "(default)"
sf-listen-address: "REDACTED"
sf-disable-proxy-check: ""
sf-db-path: "/opt/starfish/pg/13"
sf-db-storage-type: "raid"
sf-enable-backup: "no"
sf-backup-path: ""
sf-backup-retention: "2"
sf-enable-diagnostic-reports: "no"
sf-diagnostic-reports-to-starfish-team: "no"
sf-obfuscated-reports-to-starfish-team: "no"
sf-diagnostic-reports-attachments: "yes"
sf-diagnostic-reports-extra-emails-errors-only: ""
sf-diagnostic-reports-from-email: ""
sf-diagnostic-reports-ignored-errors-pattern: ""
redash-email: "starfish@starfishstorage.com"
redash-password: "*****"
redash-enable-backup: "no"
redash-backup-path: ""
Writing installation params to /root/.starfish/installation-defaults
Free disk space for /opt/starfish/pg/13: 105216491520 bytes
Adding Starfish public GPG key
Selecting previously unselected package starfish-release.
(Reading database ... 113528 files and directories currently installed.)
Preparing to unpack starfish-release.noble_all.deb ...
Unpacking starfish-release (1.3-26.noble) ...
Setting up starfish-release (1.3-26.noble) ...
...
Configuring Redash
Configuring Redash
Redash admin user starfish@starfishstorage.com password updated.
Redash credentials saved in /opt/starfish/etc/99-local.ini.
Configuring Redash
Alembic upgrade to head, config file /opt/starfish/alembic/redash/alembic.ini
Configuring Redash v10 on address 'http://localhost:5003'...
Creating report: Redash Report Generation Status
Creating report: Estimate Duplicates
Creating report: Volume Stats
Refreshing query for visualization: estimate_duplicates.Table
Refreshing query for visualization: stats.Table
Dashboard 'Starfish Information' URL: http://localhost:5003/dashboards/1-starfish-information
Dashboard 'System Dashboard' URL: http://localhost:5003/dashboards/2-system-dashboard
Dashboard 'Volume Global Analytics' URL: http://localhost:5003/dashboards/3-volume-global-analytics
###### Starfish Installation is Complete ######
root@sf01:/home/qadmin/starfish#
Pretty easy install. Now, before leaving the CLI we need to do a couple things. First, remember those two files we downloaded during the storage config? We need to use those on the Starfish node. I used SCP to push them to /home/qadmin. After you get them there we need to mount our Scale-Out File Storage to the Starfish node using CephFS.
root@sf01:/home/qadmin# ls ceph*
ceph.client.starfish.keyring  ceph.conf
root@sf01:/home/qadmin# mkdir /etc/ceph
root@sf01:/home/qadmin# cp ceph.c* /etc/ceph
root@sf01:/home/qadmin# chown root:root /etc/ceph/ceph.*
root@sf01:/home/qadmin# chmod 600 /etc/ceph/ceph.client.starfish.keyring
root@sf01:/home/qadmin# mkdir /mnt/content
root@sf01:/home/qadmin# apt install ceph-common
Reading package lists... 0%Reading package lists... 100%Reading package lists... Done
Building dependency tree... 0%Building dependency tree... 0%Building dependency tree... 50%Building dependency tree... 50%Building dependency tree... Done
Reading state information... 0% Reading state information... 0%Reading state information... Done
The following additional packages will be installed:
  ibverbs-providers libbabeltrace1 libboost-context1.83.0 libboost-iostreams1.83.0
  libboost-program-options1.83.0 libboost-url1.83.0 libcephfs2 libdaxctl1 libgoogle-perftools4t64
  libibverbs1 liblmdb0 liblua5.4-0 libncurses6 libndctl6 libnl-3-200 libnl-route-3-200 liboath0t64
  libpmem1 libpmemobj1 librabbitmq4 librados2 libradosstriper1 librbd1 librdmacm1t64
  libtcmalloc-minimal4t64 python3-ceph-argparse python3-ceph-common python3-cephfs python3-prettytable
  python3-rados python3-rbd python3-wcwidth
Suggested packages:
  ceph ceph-mds
The following NEW packages will be installed:
  ceph-common ibverbs-providers libbabeltrace1 libboost-context1.83.0 libboost-iostreams1.83.0
  libboost-program-options1.83.0 libboost-url1.83.0 libcephfs2 libdaxctl1 libgoogle-perftools4t64
  libibverbs1 liblmdb0 liblua5.4-0 libncurses6 libndctl6 libnl-3-200 libnl-route-3-200 liboath0t64
  libpmem1 libpmemobj1 librabbitmq4 librados2 libradosstriper1 librbd1 librdmacm1t64
  libtcmalloc-minimal4t64 python3-ceph-argparse python3-ceph-common python3-cephfs python3-prettytable
  python3-rados python3-rbd python3-wcwidth
0 upgraded, 33 newly installed, 0 to remove and 24 not upgraded.
Need to get 37.8 MB of archives.
After this operation, 152 MB of additional disk space will be used.
Do you want to continue? [Y/n]
0% [Working]
...
Running kernel seems to be up-to-date.
No services need to be restarted.
No containers need to be restarted.
No user sessions are running outdated binaries.
No VM guests are running outdated hypervisor (qemu) binaries on this host.
root@sf01:/home/qadmin# mount.ceph starfish@.scan_content=/starfishCephFS /mnt/content/
root@sf01:/home/qadmin# touch /mnt/content/here_i_am
root@sf01:/home/qadmin# sf volume add cdephfs /mnt/content
Volume cephfs at /mnt/content added on https://10.0.18.51:30002.
Daily diff scan at 21:00 will be configured after the initial scan completes. To modify the time, use the 'sf cron' command. If cron auto-addition is disabled, the sf cron list won't be updated.
The one last thing we need to do is to change the password for the starfish user as we’ll use this to access the web UI.
root@sf01:/home/qadmin# passwd starfish
New password:
Retype new password:
passwd: password updated successfully
Configure Starfish to use Scale-Out File and Scale-Out Object Storage
Now let’s move into the Starfish web UI to complete the config.
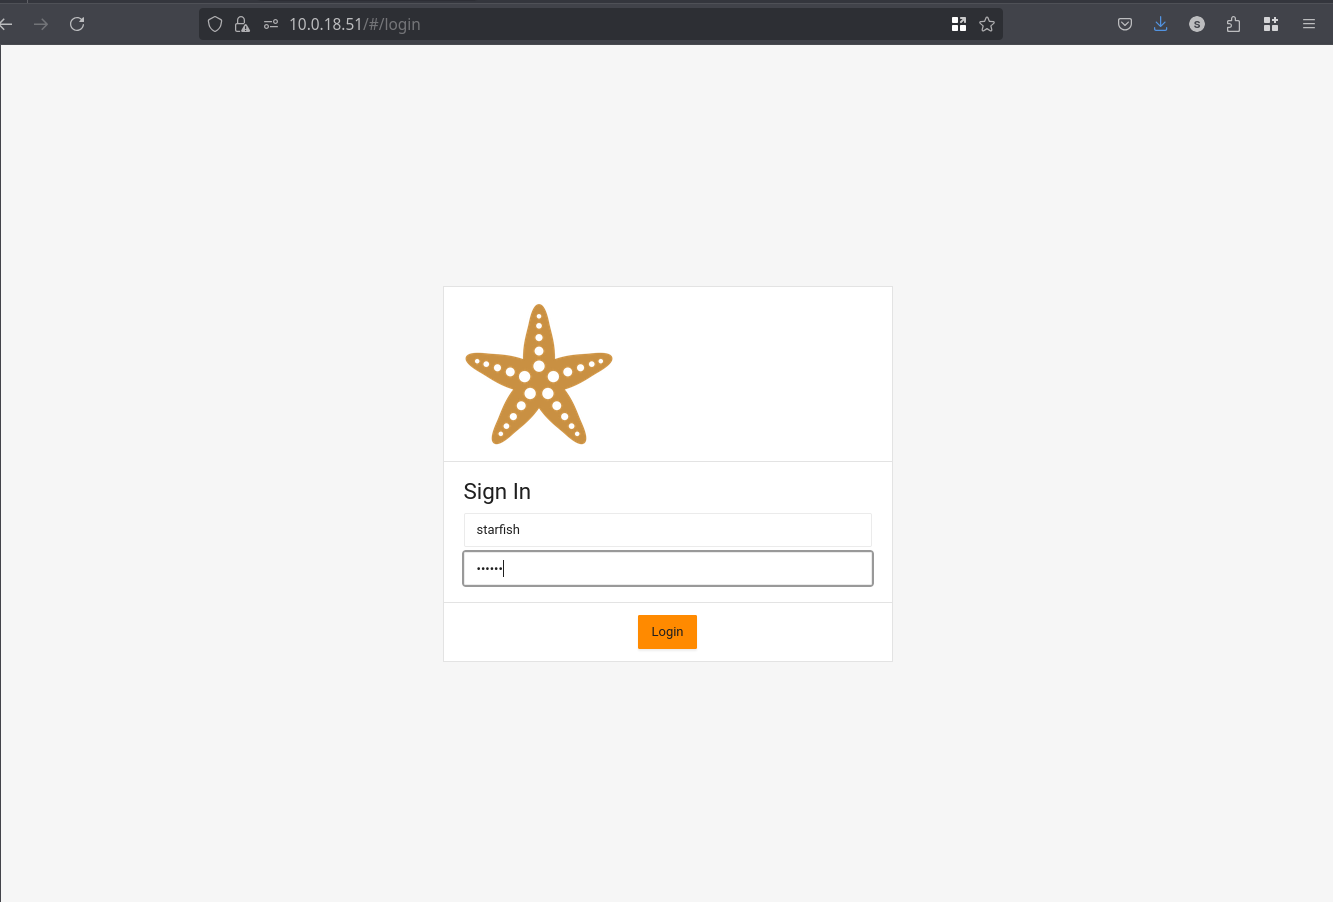
ACTION: Navigate your browser to the IP address or FQDN of your Starfish node.
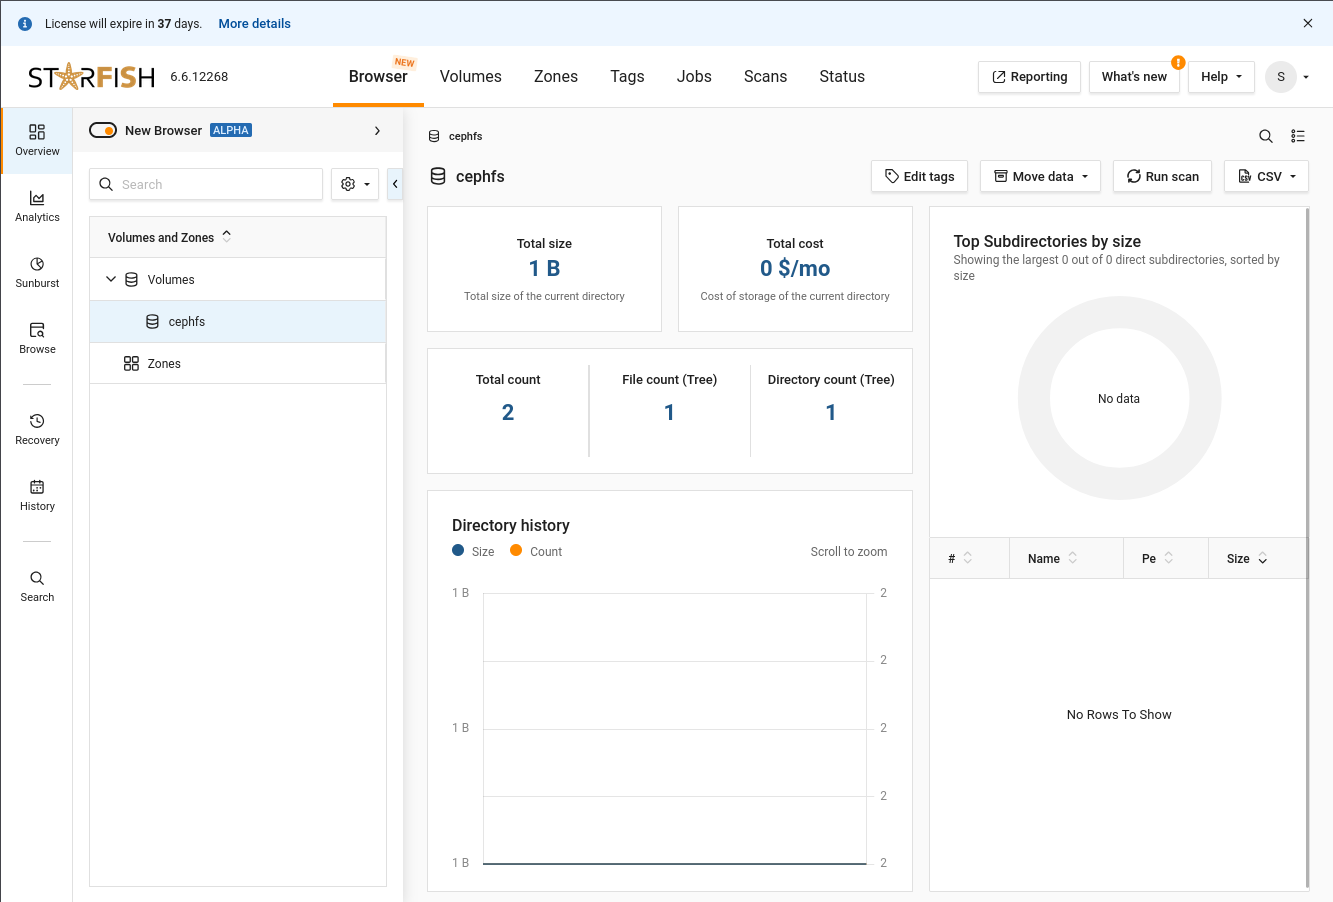
After logging in, you’ll see this interface.
ACTION: Click on cephfs in the Volumes and Zones list
ACTION: Click “More details” next to the license expiration message at the top-left of the page
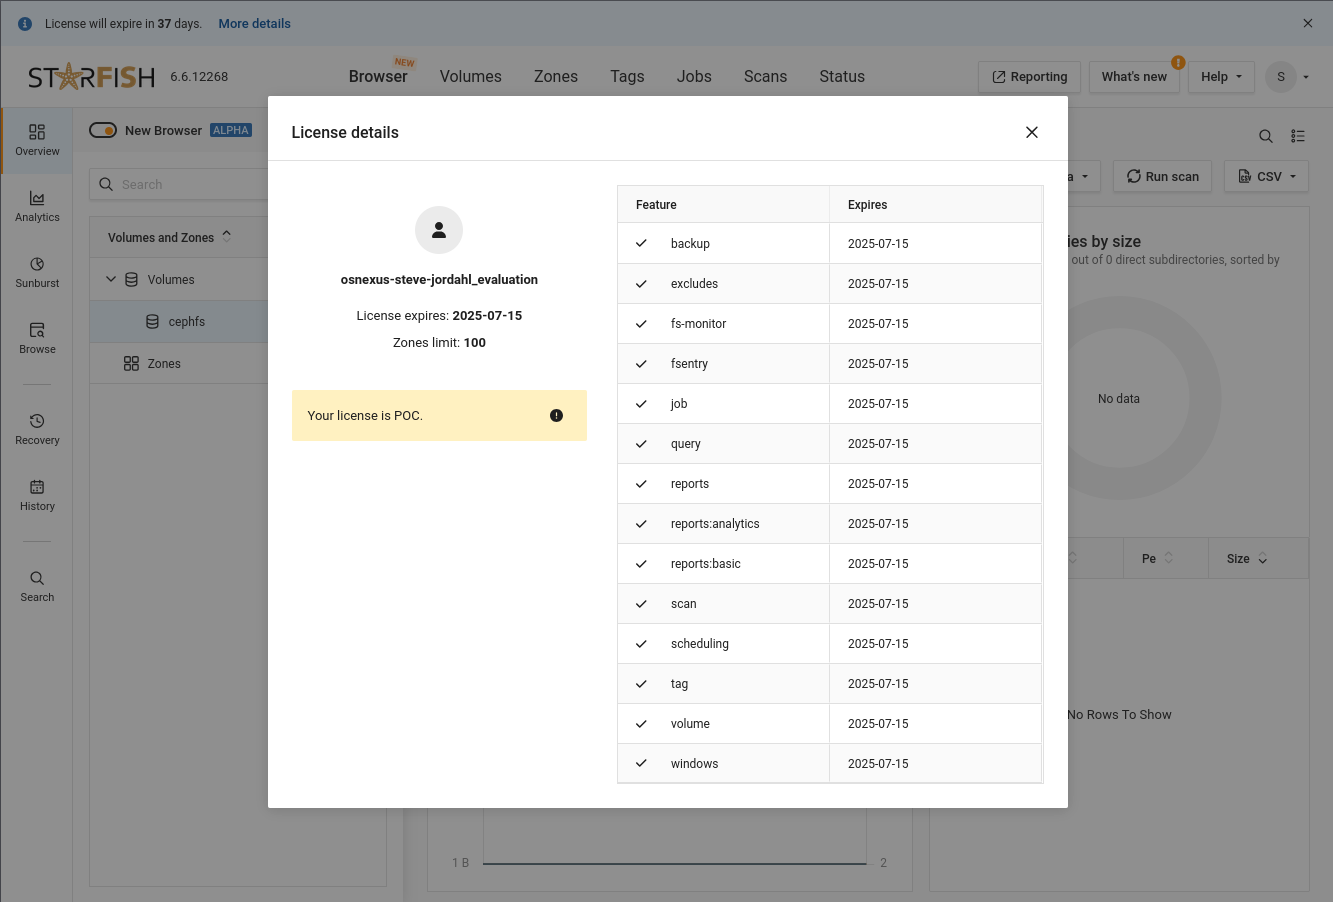
ACTION: Close the license details
Now we’ll complete the last item on our list, to configure Starfish to use the Scale-Out Object Storage we configured as an Archive Target.
ACTION: Click the Jobs item in the top-middle of the page
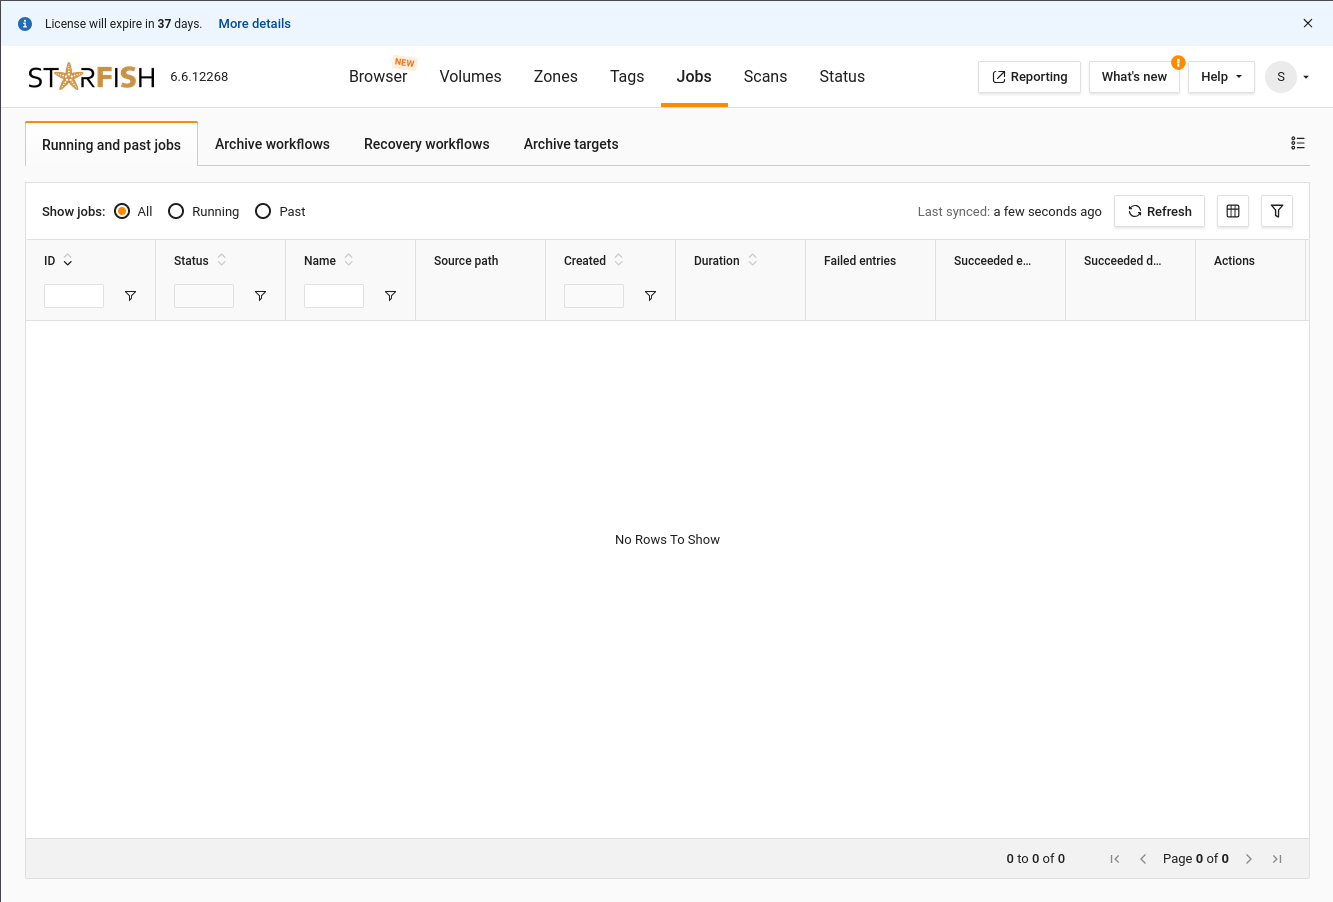
ACTION: Click the “Archive targets” tab

ACTION: Click the Add target button
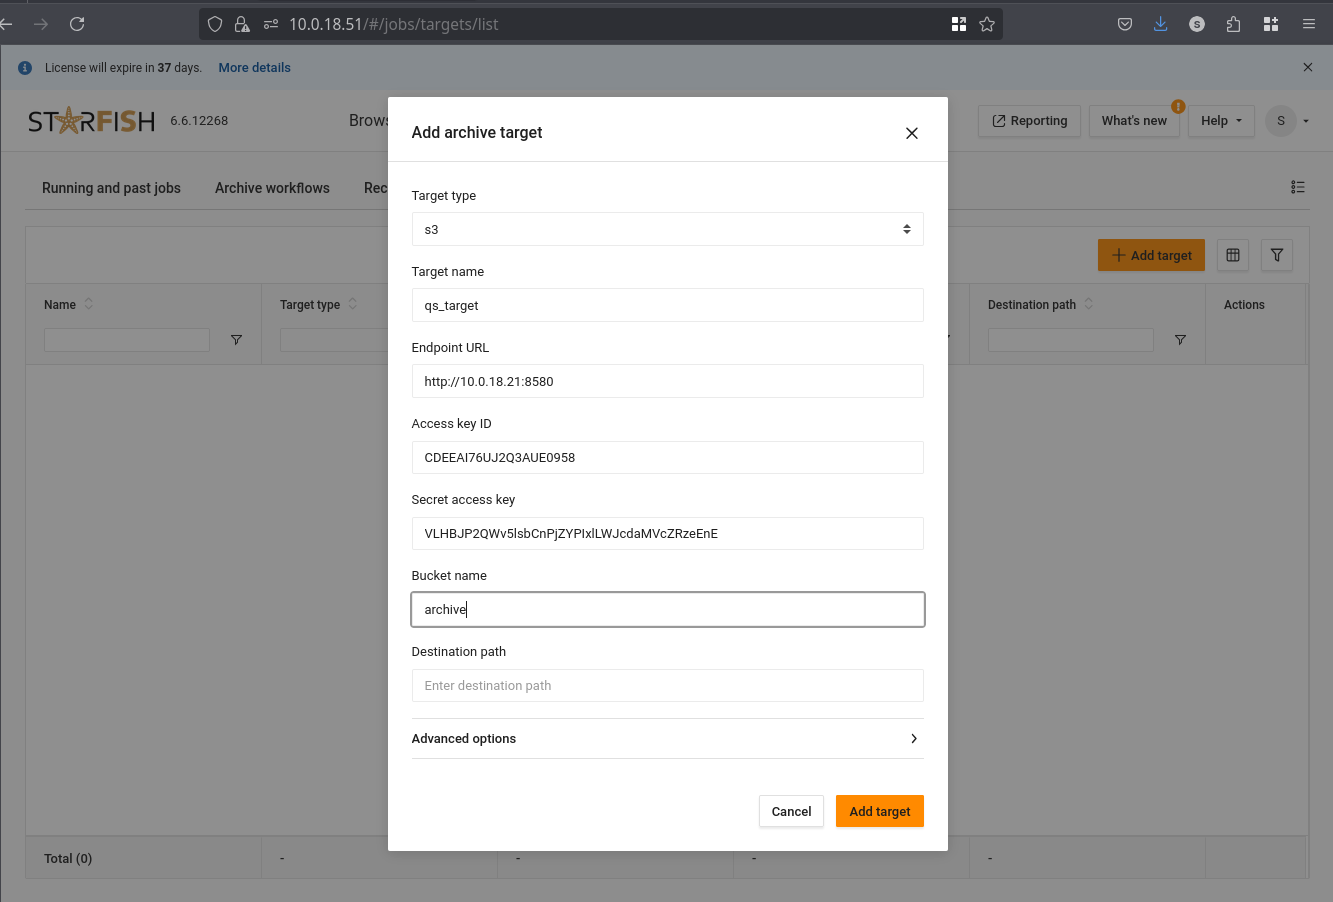
ACTION: Configure the archive target
- Target type: S3
- Target name: qs_target
- Endpoint URL: http://{FQDN/IP}:8580
- Access key ID: {Copied and saved at the end of storage configuration}
- Secret access key: {Copied and saved at the end of storage configuration}
- Bucket name: archive
- Destination path: [empty]
- If necessary, expand Advanced options
- Region name: us-west-1
- Click Add target
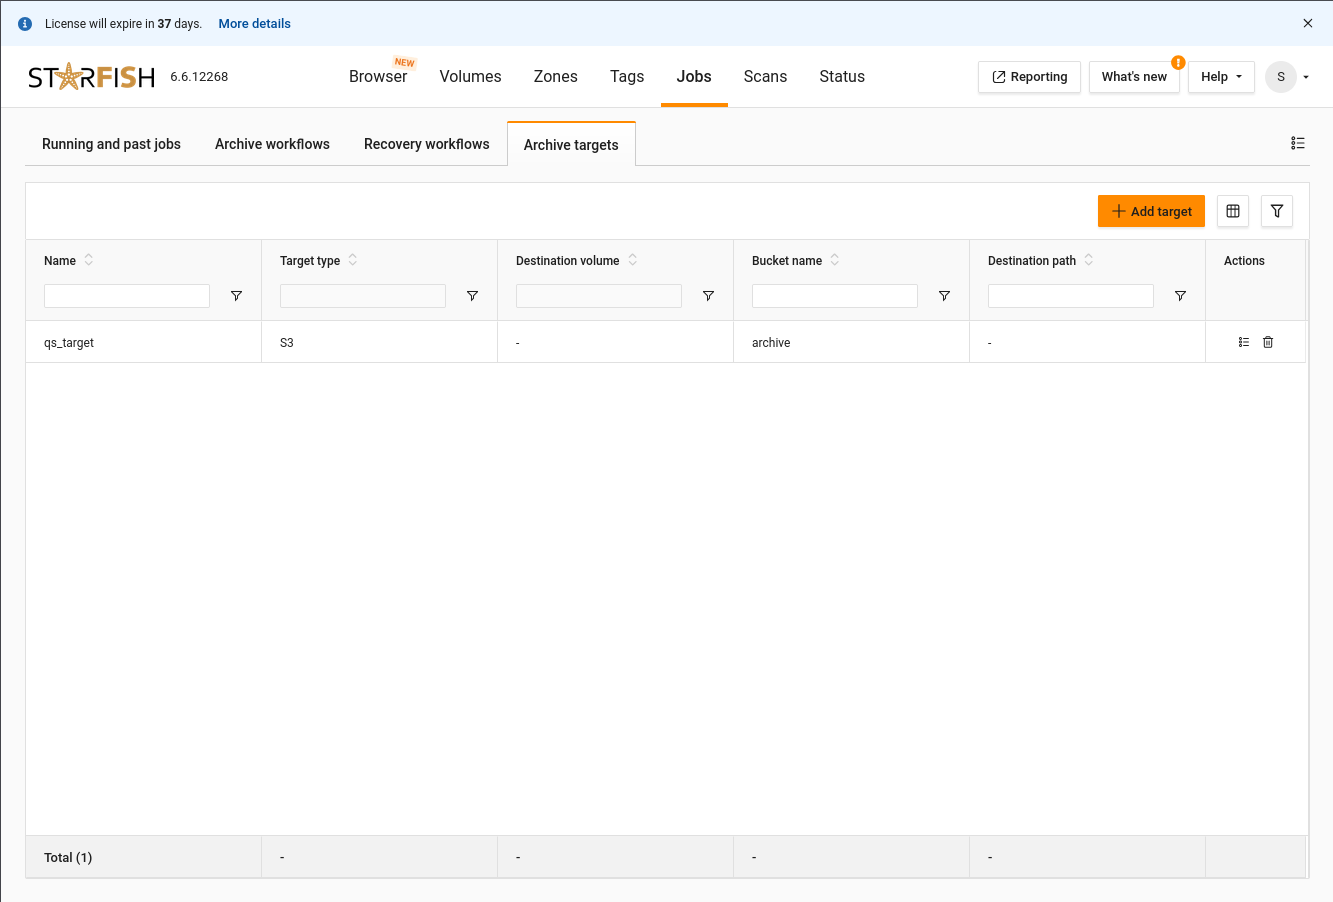
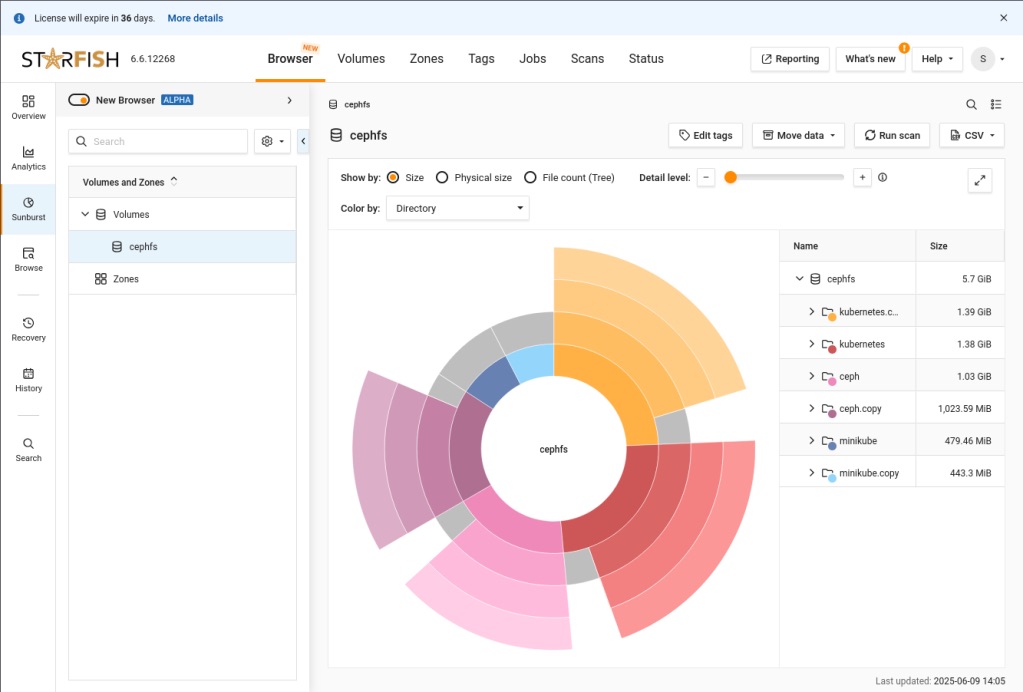
And that’s it. We’ve completed configuring Starfish to use QuantaStor Scale-Out Object Storage and Scale-Out File Storage. Here’s a shot of one of the analytics screens after the CephFS scan.

Final Words
I hope you found this activity valuable. Starfish Storage delivers powerful visibility and control over unstructured data at scale, turning file system metadata into actionable intelligence. Its ability to automate data lifecycle tasks—like migration, backup, and archiving—enables organizations to manage billions of files efficiently, reduce storage costs, and make informed, data-driven decisions.
I’d love to hear feedback from your adventure deploying this. Please start a comment thread and let me know how it went.
If you have ideas for additional posts that would be valuable to you please don’t hesitate to drop me a line and share them at steve.jordahl at osnexus.com!
Useful Resources
- OSNexus Home: https://www.osnexus.com/
- QuantaStor Home: https://www.osnexus.com/products/software-defined-storage
- Starfish Storage Home: https://starfishstorage.com
- Starfish Storage Support: https://starfishstorage.zendesk.com
- Ceph mount command: https://docs.ceph.com/en/latest/man/8/mount.ceph/

Leave a comment