Synopsis
In modern high-performance computing (HPC), artificial intelligence (AI) and enterprise environments, storage latency and CPU overhead are critical bottlenecks. NFS over RDMA offers a powerful solution by enabling zero-copy, low-latency data transfer between clients and storage servers. However, to unlock its true potential on Ethernet fabrics, a lossless network is essential.
This blog explores the fundamentals of using NFS over RDMA with OSNexus QuantaStor, why lossless networking mechanisms like PFC and ECN are required, and the infrastructure prerequisites for successful deployment. It provides a high-level overview of configuration steps to get you started and highlights the performance benefits for data-intensive workloads.
By the end, readers will understand how to deploy NFS over RDMA with QuantaStor, how a lossless network works and the benefits that can be produced.
NFS over RDMA is…
… an extension of the Network File System (NFS) protocol that uses Remote Direct Memory Access (RDMA) as the transport layer instead of traditional TCP/IP sockets.
Normally, when a client reads/writes data via NFS:
- Data is copied multiple times (from app → kernel → TCP stack → NIC buffer, and back in reverse).
- Every packet involves the CPU for handling TCP/IP processing.
- This adds latency and CPU overhead, which becomes a bottleneck at high throughput.
With RDMA:
- Data can be transferred directly from the client’s memory to the server’s memory (and vice versa).
- The CPU is bypassed for most of the data path.
- This means lower latency, lower CPU usage, and higher throughput compared to NFS/TCP.

Lossless Networking is…
… an approach to Ethernet where packets are not dropped during network congestion. Instead of discarding data when buffers fill (as in traditional Ethernet), the network uses special flow control mechanisms to pause traffic temporarily and prevent packet loss. In essence, it takes the reliability control away from the network (TCP) and proactively lets the client, network and server communicate to control traffic flow so that no transmissions are lost. This is critical for technologies like RDMA over Converged Ethernet (RoCE), where packet loss breaks the RDMA transport — unlike TCP, RDMA does not retransmit lost packets.
Lossless Ethernet relies on the Data Center Bridging (DCB) enhancements to Ethernet:
- Priority Flow Control (PFC, IEEE 802.1Qbb)
- Instead of pausing all traffic on a link (like standard PAUSE frames), PFC can pause traffic by priority/class.
- This ensures RDMA traffic is protected, while other normal traffic (like management, storage, or bulk transfers) continue as usual.
- Enhanced Transmission Selection (ETS, IEEE 802.1Qaz)
- Allocates bandwidth among traffic classes (e.g., RDMA, iSCSI, best-effort).
- Prevents starvation of non-RDMA traffic.
- Explicit Congestion Notification (ECN, RFC 3168 + DCQCN for RoCE)
- Instead of dropping packets under congestion, switches mark packets.
- Endpoints detect the congestion marks and throttle their send rate, avoiding packet loss.
Together, these features make Ethernet behave like InfiniBand in terms of reliability, but on standard data center infrastructure.
QuantaStor is…
… an enterprise-grade Software Defined Storage platform that turns standard servers into multi-protocol, scale-out storage appliances and delivers file, block, and object storage. OSNexus has made managing enterprise-grade, performant scale-out storage (Ceph-based) and scale-up storage (ZFS-based) extremely simple in QuantaStor, and able to be done quickly from anywhere. The differentiating Storage Grid technology makes storage management a breeze.
At a Glance
In this post I will discuss the implementation of NFS over RDMA using QuantaStor as the NFS server and an Ubuntu NFS client. I’m doing this over an Ethernet network using RDMA over Converged Ethernet (RoCE v2) with a Mellanox (NVIDIA) switch and Mellanox ConnectX SmartNIC, which is a more advanced Network Interface Card (NIC). For simplicity, I’m specifically not going to get into implementing NFS over RDMA using InfiniBand nor iWARP. Infiniband is a high speed networking technology that displaces Ethernet. iWARP is a competing technology to RoCE but doesn’t require lossless networking and is not as widely deployed.
The general requirements for the activity are as follows:
- NICs that support RoCE
- Mellanox, Broadcom and Intel support RoCE, as well as other smaller players, but not all cards from each vendor have RoCE support
- A lossless-capable network infrastructure
- Mellanox, Arista, Cisco, Broadcom, Dell and HPE all support lossless capability on SOME of their hardware lines
- A Linux kernel that supports RDMA capabilities
- Many kernels will support RDMA. The Hardware Enablement (HWE) kernel provided in Ubuntu 24.04 doesn’t appear to support RDMA so you need to choose another kernel.
Let’s Go!
Here’s the agenda:
- Discuss configuring lossless networking
- Configure QuantaStor to support NFS server over RDMA
- Configure Ubuntu 24.04 to support NFS client over RDMA
- Assess the value of transferring data using NFS over RDMA
Most of our activities will be at the command line, but there will be a couple of things we do in the GUI. In that regard, it will be good for you to know the layout of the QuantaStor Web UI so I can easily convey instructions for you to follow along.

Activity Components
For this article, I’m using physical Dell PowerEdge server nodes for both client and server. The configuration details aren’t really important since we’re focused on networking protocols and not really about storage configuration, with the one notable exception that I’m using Mellanox ConnectX-5 series SmartNICs.
Up until recently, to enable RDMA on a node required that you install the OpenFabrics Enterprise Distribution (OFED), a software stack (kernel modules, drivers, libraries, and user tools) that enables RDMA and related technologies such as InfiniBand, RoCE, and iWARP on Linux. Mellanox distributed their own version of OFED called MLNX_OFED, but it’s recently been transitioned to NVIDIA/Mellanox DOCA (Data Center-on-a-Chip Architecture) which includes the runtime framework for utilizing BlueField DPUs (Data Processing Units) and ConnectX SmartNICs. It provides APIs, libraries, drivers, and tools that allow for offload of networking, storage, and security workloads directly onto the DPU’s ARM cores and hardware accelerators, bypassing the host CPU. DOCA includes the stack required to enable RDMA using ConnectX NICs.
Since the transition from OFED to DOCA is so new, here is the verbiage on their page:
MLNX_OFED has transitioned into DOCA-Host, and now is available as DOCA-OFED profile […].
MLNX_OFED last standalone release is October 2024 Long Term Support (3 years). Starting January 2025 all new features will only be included in DOCA-OFED. Download DOCA-Host here.
Configuring Lossless Networking
Because this is a storage blog and the steps to configure lossless networking vary from switch/vendor to switch/vendor, I’m not going to go over the actual switch configuration. Rather, I’ll add some color to the technologies that need to be employed on the switch(es) to accomplish the task.
Lossless networking requires three main technologies:
- Traffic Marking – The means of which to identify certain traffic types.
- Traffic Shaping – The ability to set QoS limits and guarantees onto specific traffic types.
- Congestion/Flow Control – The ability to detect possible congestion and throttle back network pressure to decrease the possibility of packet drops.
Traffic Marking should be handled by the client and server. When sending packets, they add marking information in the DiffServ IP header field. This tells the network what type of data is contained in the packet.
Traffic Shaping is handled by the network switch(es) and allows for the creation of prioritized traffic classes. These classes allow the network to apply Quality of Service (QoS) techniques such that certain traffic flows are treated differently than others. This is where Enhanced Transmission Selection (mentioned above) is implemented.
Congestion/Flow Control is handled cooperatively by the network and the nodes involved in the traffic flow. When the network recognizes congestion it adds markings to the Explicit Congestion Notification (ECN) field in the IP header of the packets. Upon a node receiving the ECN markings, the node sends a Congestion Notification Packet (CNP) to the other node signaling that it should adjust the sending rate of the corresponding flow, mitigating network congestion and preventing packet loss.
Configure QuantaStor (Server)
At the time of this writing OSNexus QuantaStor does not yet use the newer DOCA software stack but rather uses the older MLNX_OFED stack. They have created an install script that installs and configures the MLNX_OFED stack, which is what we will use here. Create an SSH connection to the QuantaStor server to start the install.
qadmin@qs-r730-44-23:~$ sudo -i
[sudo] password for qadmin:

# Download the install script
root@qs-r730-44-23:~# curl -o ./mellanox-ofed-install.sh http://packages.osnexus.com/packages-redhat/mellanox-ofed-install.sh
  % Total    % Received % Xferd  Average Speed   Time    Time     Time  Current
                                 Dload  Upload   Total   Spent    Left  Speed
   0     0    0     0    0     0      0      0 --:--:-- --:--:-- --:--:--
0100 15162  100 15162    0     0  50066      0 --:--:-- --:--:-- --:--:-- 50205

# Change permissions on the script
root@qs-r730-44-23:~# chmod 755 mellanox-ofed-install.sh

# Perform the install
root@qs-r730-44-23:~# ./mellanox-ofed-install.sh
Switching GCC symlink to: /usr/bin/gcc-12
MLNX_OFED_VER: 24.04-0.6.6.0
KERNEL_VERSION: 6.5.0-35-generic
QSREPO: packages.osnexus.com/packages-redhat
DISTRIB_ID: ubuntu
DISTRIB_RELEASE: 22.04
DISTRIB_CODENAME: ubuntu22.04
SYSLOGUSER: syslog:adm

[... apt process ...]

Making the /tmp/MLNX_OFED-24.04-0.6.6.0 staging directory.
Downloading the Mellanox OFED Install package.
--2025-09-18 23:19:42--  https://content.mellanox.com/ofed/MLNX_OFED-24.04-0.6.6.0/MLNX_OFED_LINUX-24.04-0.6.6.0-ubuntu22.04-x86_64.tgz
Resolving content.mellanox.com (content.mellanox.com)... 107.178.241.102
Connecting to content.mellanox.com (content.mellanox.com)|107.178.241.102|:443... connected.
HTTP request sent, awaiting response... 200 OK
Length: 325040157 (310M) [application/x-tar]
Saving to: ‘/tmp/MLNX_OFED-24.04-0.6.6.0/MLNX_OFED_LINUX-24.04-0.6.6.0-ubuntu22.04-x86_64.tgz’

                  MLNX_OFED_LINUX-24.04-0.6.6.0-ubuntu 100%[=====================================================================>] 309.98M  9.57MB/s    in 32s

2025-09-18 23:20:14 (9.77 MB/s) - ‘/tmp/MLNX_OFED-24.04-0.6.6.0/MLNX_OFED_LINUX-24.04-0.6.6.0-ubuntu22.04-x86_64.tgz’ saved [325040157/325040157]

Extracting the Mellanox OFED Install package.
/tmp/MLNX_OFED-24.04-0.6.6.0 ~

[... package extraction listing ...]

mlnx-ofed-kernel not found in DKMS.
kernel-mft-dkms not found in DKMS.

[... apt process ...]

/tmp/MLNX_OFED-24.04-0.6.6.0/MLNX_OFED_LINUX-24.04-0.6.6.0-ubuntu22.04-x86_64 ~
Note: This program will create MLNX_OFED_LINUX TGZ for ubuntu22.04 under /tmp/MLNX_OFED_LINUX-24.04-0.6.6.0-6.5.0-35-generic directory.
See log file /tmp/MLNX_OFED_LINUX-24.04-0.6.6.0-6.5.0-35-generic/mlnx_iso.144034_logs/mlnx_ofed_iso.144034.log

Checking if all needed packages are installed...
Building MLNX_OFED_LINUX DEBS . Please wait...
Creating metadata-rpms for 6.5.0-35-generic ...
WARNING: If you are going to configure this package as a repository, then please note
WARNING: that it is not signed, therefore, you need to set 'trusted=yes' in the sources.list file.
WARNING: Example: deb [trusted=yes] file:/<path to MLNX_OFED DEBS folder> ./
Created /tmp/MLNX_OFED_LINUX-24.04-0.6.6.0-6.5.0-35-generic/MLNX_OFED_LINUX-24.04-0.6.6.0-ubuntu22.04-ext.tgz
Removing old packages...
Uninstalling the previous version of MLNX_OFED_LINUX
Installing /tmp/MLNX_OFED_LINUX-24.04-0.6.6.0-6.5.0-35-generic/MLNX_OFED_LINUX-24.04-0.6.6.0-ubuntu22.04-ext
/tmp/MLNX_OFED_LINUX-24.04-0.6.6.0-6.5.0-35-generic/MLNX_OFED_LINUX-24.04-0.6.6.0-ubuntu22.04-ext/mlnxofedinstall --force --without-dkms --force --skip-distro-check --skip-unsupported-devices-check --with-nvmf --kernel 6.5.0-35-generic -s /lib/modules/6.5.0-35-generic/build
Logs dir: /tmp/MLNX_OFED_LINUX.356519.logs
General log file: /tmp/MLNX_OFED_LINUX.356519.logs/general.log

Below is the list of MLNX_OFED_LINUX packages that you have chosen
	(some may have been added by the installer due to package dependencies):

ofed-scripts
mlnx-tools
mlnx-ofed-kernel-utils
mlnx-ofed-kernel-modules
iser-modules
...

This program will install the MLNX_OFED_LINUX package on your machine.
Note that all other Mellanox, OEM, OFED, RDMA or Distribution IB packages will be removed.
Those packages are removed due to conflicts with MLNX_OFED_LINUX, do not reinstall them.

Checking SW Requirements...

[... Package Installation ...]

Added 'RUN_FW_UPDATER_ONBOOT=no to /etc/infiniband/openib.conf

Initializing...
Attempting to perform Firmware update...
Querying Mellanox devices firmware ...

Device #1:
----------

  Device Type:      ConnectX5
  Part Number:      MCX516A-CCA_Ax
  Description:      ConnectX-5 EN network interface card; 100GbE dual-port QSFP28; PCIe3.0 x16; tall bracket; ROHS R6
  PSID:             MT_0000000012
  PCI Device Name:  04:00.0
  Base GUID:        98039b030003a7dc
  Base MAC:         98039b03a7dc
  Versions:         Current        Available
     FW             16.35.3502     16.35.3502
     PXE            3.6.0902       3.6.0902
     UEFI           14.29.0015     14.29.0015

  Status:           Up to date


Log File: /tmp/2TIZe4yXpH
Real log file: /tmp/MLNX_OFED_LINUX.356519.logs/fw_update.log
Device (04:00.0):
	04:00.0 Ethernet controller: Mellanox Technologies MT27800 Family [ConnectX-5]
	Link Width: x16
	PCI Link Speed: 8GT/s

Device (04:00.1):
	04:00.1 Ethernet controller: Mellanox Technologies MT27800 Family [ConnectX-5]
	Link Width: x16
	PCI Link Speed: 8GT/s

Installation passed successfully
To load the new driver, run:
/etc/init.d/openibd restart
Note: In order to load the new nvme-rdma and nvmet-rdma modules, the nvme module must be reloaded.
~
Reinstalling QuantaStor packages..

[... apt process ...]

NEEDRESTART-VER: 3.5
NEEDRESTART-KCUR: 6.5.0-35-generic
NEEDRESTART-KEXP: 6.5.0-35-generic
NEEDRESTART-KSTA: 1
NEEDRESTART-UCSTA: 1
NEEDRESTART-UCCUR: 0xb000040
NEEDRESTART-UCEXP: 0xb000040
Removed /etc/systemd/system/lossless_mlx.service.
Removed /etc/systemd/system/default.target.wants/lossless_mlx.service.
ln: failed to create symbolic link '/lib/systemd/system/lossless_mlx.service': File exists
Created symlink /etc/systemd/system/default.target.wants/lossless_mlx.service → /opt/osnexus/quantastor/bin/lossless_mlx.service.
Created symlink /etc/systemd/system/lossless_mlx.service → /opt/osnexus/quantastor/bin/lossless_mlx.service.
Mellanox OFED install completed. Please reboot for driver, kernel, and/or Mellanox firmware changes to take effect.
Reverting GCC symlink to original: /usr/bin/x86_64-linux-gnu-gcc-11
root@qs-r730-44-23:~# reboot
Connection to 10.0.44.23 closed by remote host.
Connection to 10.0.44.23 closed.
After the server comes back up, there’s a couple things we need to take care of in the web UI. We need to enable lossless networking on the ConnectX interface that’s connected to the lossless-enabled network infrastructure and we also need to enable jumbo frames.
Connect to the web UI in the browser.

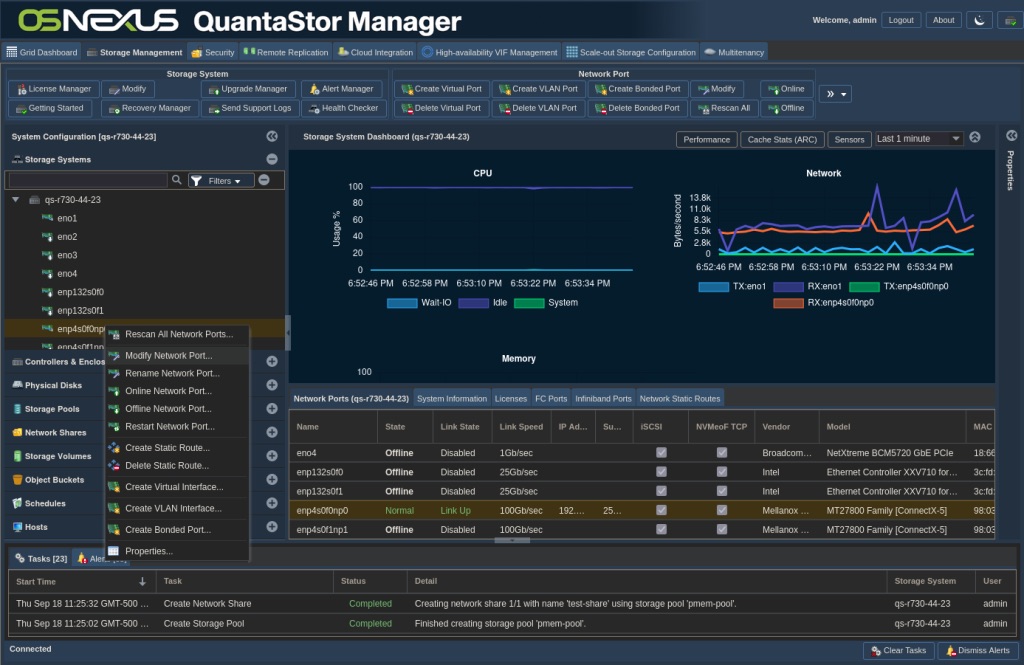
After logging in, right-click the RDMA capable interface that you’re using and select Modify Network Port…

In the following dialog do two things; Check the Lossless Networking checkbox and set the MTU to 9000 (this enables jumbo frames). Then click OK.

Now that that’s complete, we need to go back to the command line make a few final configurations. Create an SSH connection to the QuantaStor server to continue.
qadmin@qs-r730-44-23:~$ sudo -i
[sudo] password for qadmin:

# Load the RDMA kernel module
root@qs-r730-44-23:~# modprobe rpcrdma

# Make the RDMA kernel module load on boot
root@qs-r730-44-23:~# echo rpcrdma | sudo tee /etc/modules-load.d/mlnx.conf

# Enable RDMA for NFS
root@qs-r730-44-23:~# vi /etc/nfs.conf
# This is a general configuration for the NFS daemons and tools
...
[mountd]
# debug=0
# host=
# port=0
# grace-time=90
# lease-time=90
# udp=n
# tcp=y
# vers2=n
# vers3=y
# vers4=y
# vers4.0=y
# vers4.1=y
# vers4.2=y
rdma=y
rdma-port=20049
#
[statd]
# debug=0
# port=0
# outgoing-port=0
...

# Restart the NFS Server
root@qs-r730-44-23:~# systemctl restart nfs-kernel-server

# Validate that NFS is using RDMA
root@qs-r730-44-23:~# cat /proc/fs/nfsd/portlist
rdma 20049
rdma 20049
tcp 2049
tcp 2049

# Check that lossless/PFC is set
root@qs-r730-44-23:~# dcb pfc show dev enp4s0f0np0
pfc-cap 8 macsec-bypass off delay 7
prio-pfc 0:off 1:off 2:off 3:on 4:off 5:off 6:off 7:off

# Check that lossless/ETS is set
root@qs-r730-44-23:~# dcb ets show dev enp4s0f0np0
willing off ets-cap 8 cbs off
tc-bw 0:14 1:15 2:14 3:15 4:14 5:14 6:100 7:14
pg-bw 0:0 1:0 2:0 3:0 4:0 5:0 6:0 7:0
tc-tsa 0:ets 1:ets 2:ets 3:ets 4:ets 5:ets 6:strict 7:ets
prio-tc 0:1 1:0 2:2 3:3 4:4 5:5 6:6 7:7
reco-tc-bw 0:0 1:0 2:0 3:0 4:0 5:0 6:0 7:0
reco-tc-tsa 0:strict 1:strict 2:strict 3:strict 4:strict 5:strict 6:strict 7:strict
reco-prio-tc 0:0 1:0 2:0 3:0 4:0 5:0 6:0 7:0
root@qs-r730-44-23:~# exit
logout
qadmin@qs-r730-44-23:~$ exit
logout
Configure Ubuntu 24.04 (Client)
It’s time to install DOCA-Host on the client. With DOCA-Host, NVIDIA introduced profiles that determine what gets installed based on your objectives. There are actually a few profiles that we could use and each has their own benefits. For this activity the two best fit profiles are either doca-roce which is specifically for RoCE or mlnx-ofed which is the more traditional ofed version that’s evolved into DOCA-Host. Because I’m looking for Ethernet-only and a lightweight install, I’m using the doca-roce profile.
NOTE: For simplicity I’ve used the “qadmin” username on the client. It is NOT a QuantaStor node, it just happens to have a user named “qadmin”.
Get to the terminal or console of your client and let’s get started.
# Configure Jumbo Frames (mtu: 9000) on your lossless interface
qadmin@ubu-r730-44-21:~$ sudo vi /etc/netplan/50-cloud-init.yaml
[sudo] password for qadmin:

network:
  version: 2
  ethernets:
    eno1:
      addresses:
...
    enp132s0np0:
      addresses:
      - "192.168.44.21/16"
      mtu: 9000

# Apply the modified configuration
qadmin@ubu-r730-44-21:~$ sudo netplan apply

# Validate that the config is applied
qadmin@ubu-r730-44-21:~$ ip link | grep mtyu\ 9000
7: enp132s0np0: <BROADCAST,MULTICAST,UP,LOWER_UP> mtu 9000 qdisc mq state UP mode DEFAULT group default qlen 1000

# Install doca-roce and nfsrdma modules
qadmin@ubu-r730-44-21:~$ sudo apt install doca-roce mlnx-nfsrdma-dkms
Reading package lists... 0%Reading package lists... 100%Reading package lists... Done
Building dependency tree... 0%Building dependency tree... 0%Building dependency tree... 50%Building dependency tree... 50%Building dependency tree... Done
Reading state information... 0% Reading state information... 0%Reading state information... Done
The following additional packages will be installed:
  ibverbs-providers ibverbs-utils libibumad3 libibverbs-dev libibverbs1 librdmacm-dev librdmacm1 mlnx-ofed-kernel-dkms mlnx-ofed-kernel-utils mlnx-tools
  ofed-scripts perftest rdma-core rdmacm-utils
The following NEW packages will be installed:
  doca-roce ibverbs-providers ibverbs-utils libibumad3 libibverbs-dev libibverbs1 librdmacm-dev librdmacm1 mlnx-nfsrdma-dkms mlnx-ofed-kernel-dkms
  mlnx-ofed-kernel-utils mlnx-tools ofed-scripts perftest rdma-core rdmacm-utils
0 upgraded, 16 newly installed, 0 to remove and 14 not upgraded.
Need to get 71.2 kB/4,537 kB of archives.
After this operation, 27.5 MB of additional disk space will be used.

[... apt process ...]

Loading new mlnx-ofed-kernel-25.07.OFED.25.07.0.9.7.1 DKMS files...
Building for 6.8.0-84-generic
Building initial module for 6.8.0-84-generic
Done.
Forcing installation of mlnx-ofed-kernel

[... apt dkms processing ...]


Running the post_install script:

------------------------------------------
----- mlnx-ofed-kernel post-install ------

Package 'srp-dkms' is not installed, skipping module 'srp'.

Package 'iser-dkms' is not installed, skipping module 'iser'.

Package 'isert-dkms' is not installed, skipping module 'isert'.

Going to build and install module 'mlnx-nfsrdma' for kernel 6.8.0-84-generic.
Sign command: /usr/bin/kmodsign
Signing key: /var/lib/shim-signed/mok/MOK.priv
Public certificate (MOK): /var/lib/shim-signed/mok/MOK.der
Creating symlink /var/lib/dkms/mlnx-nfsrdma/25.07.OFED.25.07.0.9.7.1/source -> /usr/src/mlnx-nfsrdma-25.07.OFED.25.07.0.9.7.1

Building module:
Cleaning build area...
make -j88 KERNELRELEASE=6.8.0-84-generic -j16 KVER=6.8.0-84-generic K_BUILD=/lib/modules/6.8.0-84-generic/build..........
Signing module /var/lib/dkms/mlnx-nfsrdma/25.07.OFED.25.07.0.9.7.1/build/./rpcrdma.ko
Signing module /var/lib/dkms/mlnx-nfsrdma/25.07.OFED.25.07.0.9.7.1/build/./svcrdma.ko
Signing module /var/lib/dkms/mlnx-nfsrdma/25.07.OFED.25.07.0.9.7.1/build/./xprtrdma.ko
Cleaning build area...
Forcing installation of mlnx-nfsrdma

[... apt dkms processing ...]

Package 'mlnx-nvme-dkms' is not installed, skipping module 'mlnx-nvme'.
------------------------------------------

[... apt process ...]

Running kernel seems to be up-to-date.

The processor microcode seems to be up-to-date.

No services need to be restarted.

No containers need to be restarted.

No user sessions are running outdated binaries.

No VM guests are running outdated hypervisor (qemu) binaries on this host.
qadmin@ubu-r730-44-21:~$ sudo reboot
Installation takes a little while. After the reboot reconnect and let’s do the configuration.
# List the loaded modules related to rdma
qadmin@ubu-r730-44-21:~$ lsmod | grep rdma
rdma_ucm               32768  0
rdma_cm               147456  1 rdma_ucm
iw_cm                  61440  1 rdma_cm
ib_cm                 147456  2 rdma_cm,ib_ipoib
ib_uverbs             200704  2 rdma_ucm,mlx5_ib
ib_core               520192  8 rdma_cm,ib_ipoib,iw_cm,ib_umad,rdma_ucm,ib_uverbs,mlx5_ib,ib_cm
mlx_compat             16384  14 rdma_cm,ib_ipoib,mlxdevm,mlxfw,mlx5_fwctl,iw_cm,ib_umad,fwctl,ib_core,rdma_ucm,ib_uverbs,mlx5_ib,ib_cm,mlx5_core

# Load the rpcrdma module
qadmin@ubu-r730-44-21:~$ sudo modprobe rpcrdma

# Configure the rpcrdma module to load on startup
qadmin@ubu-r730-44-21:~$ echo rpcrdma | sudo tee /etc/modules-load.d/doca.conf

# Validate that the module is loaded
qadmin@ubu-r730-44-21:~$ lsmod | grep rdma
rpcrdma                98304  0
rdma_ucm               32768  0
rdma_cm               147456  2 rpcrdma,rdma_ucm
iw_cm                  61440  1 rdma_cm
ib_cm                 147456  2 rdma_cm,ib_ipoib
sunrpc                802816  13 rpcrdma,nfsv4,auth_rpcgss,lockd,rpcsec_gss_krb5,nfs
ib_uverbs             200704  2 rdma_ucm,mlx5_ib
ib_core               520192  9 rdma_cm,ib_ipoib,rpcrdma,iw_cm,ib_umad,rdma_ucm,ib_uverbs,mlx5_ib,ib_cm
mlx_compat             16384  15 rdma_cm,ib_ipoib,mlxdevm,rpcrdma,mlxfw,mlx5_fwctl,iw_cm,ib_umad,fwctl,ib_core,rdma_ucm,ib_uverbs,mlx5_ib,ib_cm,mlx5_core

# Determine the interfaces that are configured and capable of using RDMA
qadmin@ubu-r730-44-21:~$ rdma link
link mlx5_0/1 state ACTIVE physical_state LINK_UP netdev enp132s0np0

# Determine the driver's device name.  Useful with some MLNX tools.
qadmin@ubu-r730-44-21:~$ ibv_devices
    device                  node GUID
    ------               ----------------
    mlx5_0               043f720300cff762

# To make configuring lossless networking easy, we're going to utilize
# a service from QuantaStor.
qadmin@ubu-r730-44-21:~$ sudo mkdir -p /var/opt/osnexus/quantastor/conf/
[sudo] password for qadmin:
qadmin@ubu-r730-44-21:~$ sudo mkdir -p /opt/osnexus/quantastor/bin/
qadmin@ubu-r730-44-21:~$ sudo touch /var/opt/osnexus/quantastor/conf/qs_losslessNetworking.conf
qadmin@ubu-r730-44-21:~$ echo "enp132s0np0" | sudo tee /var/opt/osnexus/quantastor/conf/qs_losslessNetworking.conf
enp132s0np0
qadmin@ubu-r730-44-21:~$ cat /var/opt/osnexus/quantastor/conf/qs_losslessNetworking.conf
enp132s0np0
qadmin@ubu-r730-44-21:~$ sudo scp qadmin@10.0.44.23:/opt/osnexus/quantastor/bin/lossless_mlx.* /opt/osnexus/quantastor/bin/
qadmin@10.0.44.23's password:
lossless_mlx.service                                                                                                          0%    0     0.0KB/s   --:-- ETAlossless_mlx.service                                                                                                        100%  295   193.2KB/s   00:00
lossless_mlx.sh                                                                                                               0%    0     0.0KB/s   --:-- ETAlossless_mlx.sh                                                                                                             100%   13KB   6.3MB/s   00:00
qadmin@ubu-r730-44-21:~$ sudo ln -s /opt/osnexus/quantastor/bin/lossless_mlx.sh /usr/local/sbin/lossless_mlx.sh
qadmin@ubu-r730-44-21:~$ sudo ln -s /opt/osnexus/quantastor/bin/lossless_mlx.service /etc/systemd/system/lossless_mlx.service
qadmin@ubu-r730-44-21:~$ sudo systemctl daemon-reload
qadmin@ubu-r730-44-21:~$ sudo systemctl enable lossless_mlx.service
qadmin@ubu-r730-44-21:~$ sudo systemctl start lossless_mlx.service
qadmin@ubu-r730-44-21:~$ sudo systemctl status lossless_mlx.service
○ lossless_mlx.service - Script to set DSCP mode and default CMA TOS value
     Loaded: loaded (/etc/systemd/system/lossless_mlx.service; enabled; preset: enabled)
     Active: inactive (dead) since Fri 2025-09-26 02:14:44 UTC; 619ms ago
   Duration: 4.153s
    Process: 2581 ExecStart=/usr/local/sbin/lossless_mlx.sh configure (code=exited, status=0/SUCCESS)
   Main PID: 2581 (code=exited, status=0/SUCCESS)
        CPU: 1.634s

Sep 26 02:14:44 ubu-r730-44-21 lossless_mlx.sh[2680]:          priority:  5
Sep 26 02:14:44 ubu-r730-44-21 lossless_mlx.sh[2680]: tc: 6 ratelimit: unlimited, tsa: strict
Sep 26 02:14:44 ubu-r730-44-21 lossless_mlx.sh[2680]:          priority:  6
Sep 26 02:14:44 ubu-r730-44-21 lossless_mlx.sh[2680]: tc: 7 ratelimit: unlimited, tsa: ets, bw: 14%
Sep 26 02:14:44 ubu-r730-44-21 lossless_mlx.sh[2680]:          priority:  7
Sep 26 02:14:44 ubu-r730-44-21 lossless_mlx.sh[2686]: /usr/local/sbin/lossless_mlx.sh: line 288: mlxreg: command not found
Sep 26 02:14:44 ubu-r730-44-21 lossless_mlx.sh[2687]: /usr/local/sbin/lossless_mlx.sh: line 289: mlxreg: command not found
Sep 26 02:14:44 ubu-r730-44-21 lossless_mlx.sh[2581]: lossless_mlx.sh: mlxreg failed to disable roce_slow_restart
Sep 26 02:14:44 ubu-r730-44-21 systemd[1]: lossless_mlx.service: Deactivated successfully.
Sep 26 02:14:44 ubu-r730-44-21 systemd[1]: lossless_mlx.service: Consumed 1.634s CPU time.

# Let's validate that Priority Flow Control is configured.
# Note that we're using priority 3 for RDMA.  If your network is configured
# differently you'll need to adjust as necessary.
qadmin@ubu-r730-44-21:~$ dcb pfc show dev enp132s0np0
pfc-cap 8 macsec-bypass off delay 7                       {Set to use 8 priorities}
prio-pfc 0:off 1:off 2:off 3:on 4:off 5:off 6:off 7:off   {Priority level 3 will get lossless behavior}

# Let's validate that Enhanced Transmission Selection is configured.
# Let's validate that Enhanced Transmission Selection is configured.
# Let's validate that Enhanced Transmission Selection is configured.
qadmin@ubu-r730-44-21:~$ dcb ets show dev enp132s0np0
willing off ets-cap 8 cbs off                             # {local config, set to use 8 Traffic Classes}
tc-bw 0:14 1:15 2:14 3:15 4:14 5:14 6:100 7:14            # {bandwidth allocation per class in %}
pg-bw 0:0 1:0 2:0 3:0 4:0 5:0 6:0 7:0                     # {Priority Group Bandwidth not used}
tc-tsa 0:ets 1:ets 2:ets 3:ets 4:ets 5:ets 6:strict 7:ets # {Traffic Selection Algorithm - ETS for 3}
prio-tc 0:1 1:0 2:2 3:3 4:4 5:5 6:6 7:7                   # {mapping of 802.1p priorities to traffic classes}
# {The following are recommendations, not current settings and don't matter}
reco-tc-bw 0:0 1:0 2:0 3:0 4:0 5:0 6:0 7:0
reco-tc-tsa 0:strict 1:strict 2:strict 3:strict 4:strict 5:strict 6:strict 7:strict
reco-prio-tc 0:0 1:0 2:0 3:0 4:0 5:0 6:0 7:0

# Mount a network share from QuantaStor using RDMA
qadmin@ubu-r730-44-21:~$ sudo mount -o rdma,port=20049 192.168.44.23:/export/test-share /mnt/rdma_share-1

# Validate that the mount is actually using RDMA
# If "proto=tcp" there's a problem and the share fell back to a non-RDMA connection.
qadmin@ubu-r730-44-21:~$ mount | grep rdma,port=20049
192.168.44.23:/export/test-share on /mnt/rdma_share-1 type nfs4 (rw,relatime,vers=4.2,rsize=1048576,wsize=1048576,namlen=255,hard,proto=rdma,port=20049,timeo=600,retrans=2,sec=sys,clientaddr=192.168.44.21,local_lock=none,addr=192.168.44.23)
Assess the Value
So what’s the benefit of all of this? To get an idea of how much of a performance improvement RoCE provided to QuantaStor, I ran some tests with IOzone. IOzone runs a series of tests using various file I/O operations. Specifically, it runs the following tests: Read, write, re-read, re-write, read backwards, read strided, fread, fwrite, random read, pread, mmap, aio_read, aio_write.
For this activity, I created a psuedo-mem device (memory that presents to the system as a block device) on the QuantaStor server. This eliminates the speed limitations of physical disks so we can focus specifically on what the RDMA protocol can do for us. Then I created a single-disk (RAID-0) Storage Pool (Scale-Up Storage) and a single NFS network share. I specifically disabled compression so that there was minimal filesystem functionality between the client operation and the storage. I believe the configuration provided the least overhead possible while still being representative of a true QuantaStor storage presentation.
From the client I mounted the share over normal NFS and ran the tests. I then disconnected the NFS mount, mounted the RDMA connection and ran the tests again. The results were very impressive! The test results include lots of data — 144 values per test, which is too much to share in a post. I’ve selected a single test, (random read test) to compare the charts and I’ve summarized the rest of the data.
Random Read Report – NFS

Here you’ll see the throughput speed on the left, the file size on the bottom and the record size (or chunk size) on the right. You’ll see that the max throughput is less than 2G/s; the actual max I saw was 1.8G/s at higher block and file sizes.
Random Read Report – RDMA

Here you’ll see a number of aspects; the max throughput is 4.5G/s which is 3.29% better than the exact same sample with NFS! That’s impressive!! In addition, the speed improvement is represented better across more of the lower file sizes than with NFS.
Here’s the improvement summary per report as well as across all reports.

You’ll notice that the max throughput improvement was a whopping 5.2x!!
Summing it Up
Many workloads can benefit from increased throughput, and achieving a good amount of speed-up doesn’t have to have a crazy price tag! You might already have the switch infrastructure that supports lossless networking and at that point you might only need new NICs. Add to that the cost benefit of using QuantaStor as your backend storage platform and you’ve got a winning combination!
I’d love to hear feedback from your adventure deploying this. Please start a comment thread and let me know how it went. Or if you want the deeper dive into my results I’d love to discuss it with you.
If you have ideas for additional posts that would be valuable to you please don’t hesitate to drop me a line and share them at steve.jordahl (at) osnexus.com!
Useful Resources
- OSNexus Home: https://www.osnexus.com/
- QuantaStor Home: https://www.osnexus.com/products/software-defined-storage
- NVIDIA DOCA Downloads: https://developer.nvidia.com/doca-downloads
- NVIDIA DOCA Profiles: https://docs.nvidia.com/doca/sdk/doca+profiles/index.html
- NVIDIA DOCA Installation Guide for Linux: https://docs.nvidia.com/doca/sdk/doca+installation+guide+for+linux/index.html
Leave a Reply